
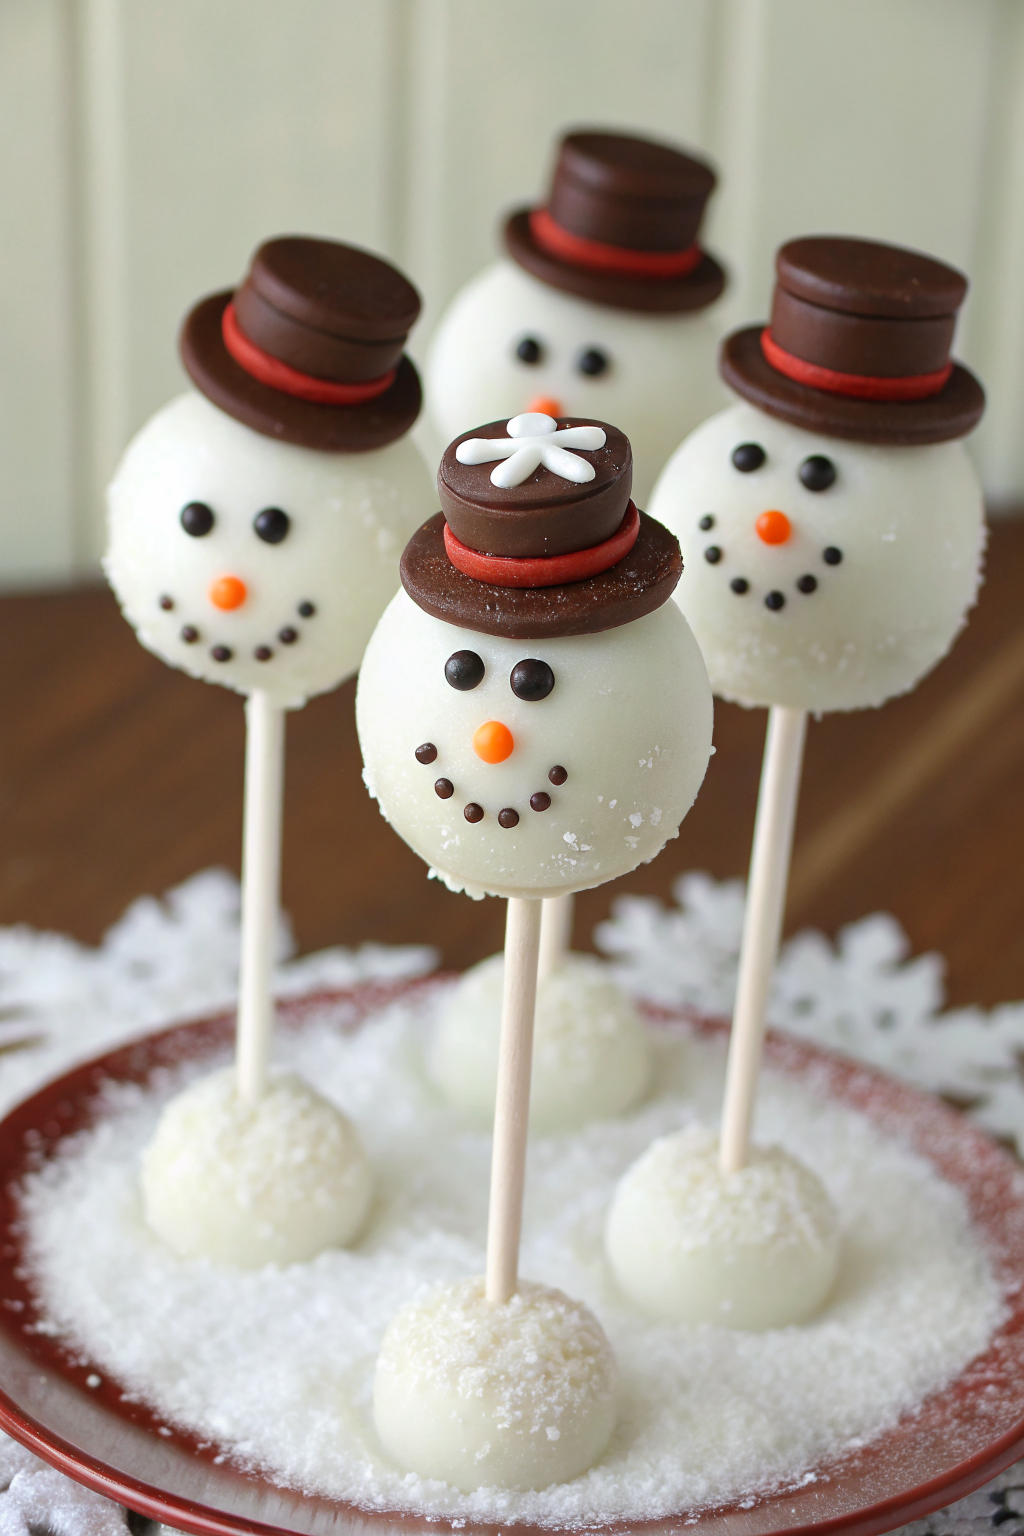
Snowman Cake Pops Recipe packs soft vanilla cake inside a crisp white chocolate shell, with a fun crunch from sprinkle buttons and a cute chocolate hat on top. This winter treat suits kids’ parties, cookie swaps, and office trays, and the whole batch takes about 90 minutes including chill time. I still smile when my kid calls them tiny snow buddies.
Why Snowman Cake Pops Recipe Is Worth It
Snowman Cake Pops Recipe gives you a showy holiday dessert without fuss, and everyone loves a dessert on a stick. You mold two cake balls per pop, stack them, and dip for a smooth coating that sets fast. I use pantry shortcuts like box cake and canned frosting, which save time and still taste great.
You can decorate with a simple face or go all out with hats and scarves. The pops travel well, so you can pack them for parties or classroom celebrations. You also make them ahead, which takes pressure off the big day.
“Cutest dessert on the table, and the vanilla cake stays moist under that white chocolate shell.” ★★★★★
Ingredients You Need
- Cake and binder
- 1 box vanilla cake mix, baked in a 9 by 13 pan and cooled completely (Pillsbury or Betty Crocker both work; a bakery sheet cake or leftover cake works too)
- 1/2 to 3/4 cup frosting, room temp (cream cheese or vanilla; canned frosting works and saves time)
- Coating
- 24 ounces bright white candy melts or white coating wafers (Ghirardelli melting wafers melt super smooth)
- 1 to 2 teaspoons coconut oil or paramount crystals to thin the coating if needed
- Sticks and structure
- 20 lollipop sticks, 6 inches
- 1 foam block or cake pop stand
- Decorations
- Mini orange sprinkles or orange sunflower seeds for noses
- Mini chocolate chips or black confetti sprinkles for eyes and buttons
- Red licorice laces or fruit leather strips for scarves
- Mini pretzel sticks for arms
- Oreo Thins and mini peanut butter cups for top hats (flat cookie for brim, peanut butter cup for top)
- Black edible marker for details
- Pink luster dust or a tiny bit of pink gel color mixed with vodka for rosy cheeks
- Equipment
- Mixing bowl, parchment-lined sheet pans, microwave-safe cups, spoons, toothpicks, kitchen scale or tablespoon scoop
Notes and swaps:
- Use gluten-free cake mix if you need a gluten-free version and pick gluten-free decorations.
- Use dairy-free white coating if you avoid dairy, and bind cake with dairy-free frosting.
- If candy melts feel thick, add a tiny bit of coconut oil until fluid.
Quick Tips & substitutions
- Bake the cake a day ahead and chill it, which makes cleaner crumbs and tighter balls.
- Crumble the cake very fine, then add frosting a spoonful at a time until the mixture holds when pressed.
- Scoop 20 small heads with a 1 tablespoon scoop and 20 larger bodies with a 1.5 tablespoon scoop for even sizes.
- Chill shaped balls 20 to 30 minutes, not longer, so the coating sets smooth and avoids cracks.
- Keep melted coating at warm room temp, not hot; aim for a slow ribbon that melts back in about 2 to 3 seconds.
- Dip the stick tip in coating before inserting, which glues the ball and prevents spinning.
- Tap your wrist gently after dipping to shake off excess; keep the pop angled so gravity smooths the shell.
- Use melted coating as glue for noses, hats, and arms; hold each piece a few seconds until it sets.
- Use oil-based candy color if you want tinted coating; water-based colors can seize the chocolate.
- Swap flavors: red velvet with cream cheese frosting, spice cake with vanilla frosting, or chocolate with peppermint bits.
How to Make Snowman Cake Pops Recipe
Step 1: Bake and cool
- Bake the vanilla cake in a 9 by 13 pan according to package directions.
- Cool the cake fully. Warm cake melts frosting and turns sticky.
Step 2: Crumble and bind
- Crumble the cake into fine crumbs in a large bowl, removing any browned edges.
- Add 1/2 cup frosting and work it in with clean hands until the mix holds together. Add up to 1/4 cup more if needed.
Step 3: Portion and shape
- Roll 20 larger balls for bodies, about 1.5 tablespoons each.
- Roll 20 smaller balls for heads, about 1 tablespoon each.
- Set on a parchment-lined sheet and chill 20 to 30 minutes.
Step 4: Prep the coating
- Melt white candy melts in a microwave-safe cup in 20 to 30 second bursts, stirring between each round.
- Add a small amount of coconut oil if the coating looks thick. Aim for a fluid, pourable texture.
Step 5: Build the snowmen
- Dip the tip of a lollipop stick into melted coating, then push it halfway into a body ball.
- Add a dot of coating on top of the body, then press a head ball on top. Repeat with all pops.
- Chill 10 minutes to set the joints.
Step 6: Dip the pops
- Dip each stacked pop straight down into the white coating, cover the whole snowman, then lift.
- Tap gently at the wrist to shed extra coating. Stand the pop in a foam block to set.
Step 7: Add faces and buttons
- While the coating stays tacky, press mini chocolate chips or black confetti sprinkles for eyes and buttons.
- Attach an orange sprinkle for the nose with a tiny dot of coating.
- Dot pink cheeks with luster dust or a tiny brush of pink gel mix if you like the rosy look.
Step 8: Make hats and scarves
- Glue a mini peanut butter cup onto an Oreo Thin half with melted coating, then attach to the head top.
- Tie a thin licorice lace or fruit leather strip around the neck for a scarf.
- Press pretzel sticks into the sides of the body for arms. Hold each add-on a few seconds so it sets.
Step 9: Dry and detail
- Let the pops stand 10 to 15 minutes until the shells feel firm.
- Add small details with a black edible marker once the coating sets.
Step 10: Clean edges and serve
- Break off any coating drips at the base with a paring knife.
- Arrange the pops in a stand or a sugar-filled jar and serve.
Variations
- Peppermint: Stir in crushed candy cane and use dark chocolate hats.
- Hot cocoa: Use chocolate cake and add mini marshmallow bits for buttons.
- Carrot cake: Use carrot cake with cream cheese frosting and cinnamon-dusted cheeks.
- Funfetti: Bake confetti cake and use bright scarves and rainbow buttons.
- Coconut snow: Roll the wet coating in fine shredded coconut for a fluffy coat.
- Gluten-free: Use gluten-free cake mix and confirm decorations meet your needs.
Ways to Serve
- Set them in a foam block centerpiece with fake snow for a dessert table.
- Pass them with hot cocoa or peppermint mochas.
- Tuck one into each lunchbox as a winter surprise.
- Wrap pairs in treat bags for party favors or stocking stuffers.
- Top a simple sheet cake with a few pops as a playful topper.
Storage
Store the decorated snowman cake pops at cool room temperature in a covered container for up to 3 days. If your kitchen runs warm or humid, keep them in the fridge and bring them to room temp before serving so the coating stays crisp. Freeze undecorated dipped pops for up to 6 weeks, then decorate after thawing at room temp. Wrap each pop in a cellophane bag if you plan to gift or stack them for travel.
Snowman Cake Pops Recipe
Ingredients
Instructions
- Bake the vanilla cake in a 9 by 13-inch pan according to package directions and let it cool completely so it does not melt the frosting.
- Crumble the cooled cake into fine crumbs in a large mixing bowl, discarding any hard or browned edges.
- Add 1/2 cup frosting to the crumbs and mix with clean hands until the mixture holds together when pressed. If needed, add up to 1/4 cup more frosting a spoonful at a time until you can easily roll smooth balls.
- Portion and roll 20 larger balls for the bodies, about 1 1/2 tablespoons each, and 20 smaller balls for the heads, about 1 tablespoon each. Place them on a parchment-lined baking sheet.
- Chill the shaped balls in the refrigerator for 20 to 30 minutes so they firm up slightly but do not get rock hard.
- Melt the white candy melts in a microwave-safe cup in 20- to 30-second bursts, stirring between each until smooth. If the coating seems thick, stir in 1 to 2 teaspoons coconut oil a little at a time until it flows in a slow, smooth ribbon.
- Dip the tip of a lollipop stick into the melted coating, then insert it halfway into a larger cake ball to form the snowman body. Add a small dot of coating on top of the body and gently press a smaller ball on top for the head. Repeat to build all 20 snowmen, then chill about 10 minutes to set the joints.
- Working with one snowman at a time, dip the stacked cake pop straight down into the melted white coating until fully covered. Lift it out and gently tap your wrist while holding the stick to shake off excess coating, keeping the pop slightly angled so the shell smooths out. Stand the pop upright in a foam block or cake pop stand to set.
- While the coating is still tacky, press mini chocolate chips or black confetti sprinkles onto each pop for eyes and buttons. Attach an orange sprinkle or sunflower seed as the nose using a tiny dot of coating. Add rosy cheeks with a touch of pink luster dust or pink gel mix if desired.
- For each hat, glue a mini peanut butter cup onto an Oreo Thin (or half of one) with melted coating, then attach the hat to the top of the snowman’s head. Tie a thin licorice lace or strip of fruit leather around the neck area for a scarf, and press mini pretzel sticks into the sides of the body for arms, using coating as needed to help them stick.
- Let the pops stand for 10 to 15 minutes until the white chocolate shells are firm. Use a black edible marker to draw tiny details like smiles or extra buttons once the coating is fully set.
- Trim away any hardened drips at the base of each pop with a small paring knife. Arrange the snowman cake pops upright in a stand or jar for serving.
Notes
Approximate per 1 snowman cake pop (1 of 20): 220 calories; fat 12 g; saturated fat 7 g; carbohydrates 27 g; fiber 0 g; sugars 22 g; protein 2 g; sodium 170 mg. Values are estimates and will vary based on cake mix, frosting, coatings, and decorations used.