
Red Velvet Cake Pops Recipe delivers tender cocoa-kissed cake rolled with tangy cream cheese frosting and dipped in a snappy candy shell. This bite-size dessert suits bake sales, birthdays, and weeknight cravings, and it takes about 2 hours start to finish. I baked my first batch for a school fundraiser and watched the tray vanish in minutes.
Why Choose This Red Velvet Cake Pops Recipe
Red Velvet Cake Pops Recipe rewards you with moist centers that hold their shape and a smooth dip that sets clean. The ratios keep the pops rich but not greasy, and the coating flows like yogurt for fewer cracks and drips. You can use a box mix or leftover cake and still nail a bakery finish.
I tested different coatings, thickeners, and chill times to cut down on sliding sticks and frosting leaks. You get clear steps, real-world timing, and brand notes that save you from last-minute runs to the store.
Perfect texture, glossy shells, and not a single pop slid off the stick — even the picky eaters asked for seconds. ★★★★★
Ingredients You Need
- Baked red velvet cake, 9 by 13 inches, fully cooled
- Shortcut: use a boxed red velvet cake mix plus the package eggs, oil, and water.
- Sub: use leftover red velvet cupcakes and measure by weight to match a 9 by 13 pan yield.
- Cream cheese frosting, 1/2 to 3/4 cup, room temp
- Shortcut: canned cream cheese frosting works fine; I like Betty Crocker or Pillsbury.
- From-scratch option: beat 4 ounces cream cheese, 2 tablespoons butter, 1 cup powdered sugar, 1/2 teaspoon vanilla, pinch of salt.
- Candy coating
- 12 to 16 ounces red or white melting wafers (Ghirardelli, Merckens, or Wilton), or almond bark.
- Thinner: 1 to 2 teaspoons vegetable shortening or 1/2 to 1 teaspoon paramount crystals per cup of melts.
- Lollipop sticks, 6 inch
- Sprinkles or sanding sugar, optional
- Oil-based gel food color, optional, for tinting white coating
- A pinch of fine sea salt to brighten the red velvet flavor
Equipment
- Mixing bowl and fork or stand mixer with paddle
- Baking sheet lined with parchment
- Cookie scoop, 1 tablespoon size
- Microwave-safe bowls or a small double boiler
- Styrofoam block or an upside-down egg carton to hold pops upright
- Small silicone spatula and toothpicks for tidying drips
How to Make Red Velvet Cake Pops Recipe
Bake and cool the cake
- Bake the red velvet cake in a 9 by 13 pan and let it cool until no warmth remains.
- Speed this by placing the pan on a wire rack and tenting lightly so steam escapes.
Crumble and mix
- Crumble the cake into fine, even crumbs. Rub large bits between your palms until they feel sandy.
- Add 1/2 cup frosting and mix with a fork or paddle. Pinch a bit of dough. If it holds cleanly, stop. If it crumbles, add frosting 1 tablespoon at a time.
Roll and chill
- Scoop level 1 tablespoon portions and roll tight, smooth balls. Aim for 22 to 26 pops.
- Line them up on a parchment-lined sheet and chill 20 to 30 minutes until firm but not rock hard.
Stick and seal
- Melt 2 tablespoons of coating. Dip 1/2 inch of each stick in the melted coating and insert it halfway into each ball.
- Chill 10 minutes to set the seal. This glue step keeps the ball from sliding.
Melt the coating
- Place coating wafers in a microwave-safe bowl. Heat at 50 percent power in 30-second bursts, stirring between each, until smooth.
- Stir in shortening or paramount crystals until the coating flows like warm yogurt. Keep the bowl warm by nestling it over a mug of hot water.
Dip and decorate
- Work with 5 to 6 pops out of the fridge at a time. Keep the rest chilled.
- Submerge a pop at a slight angle, then lift and tap the wrist gently while turning the stick so excess drips off in 10 to 15 seconds.
- Add sprinkles before the shell sets. Use a toothpick to swipe away any tails near the stick.
Set and enjoy
- Stand dipped pops in a styrofoam block to set, about 15 minutes at room temp.
- Drizzle with a contrast color once the first coat firms up.
- The hardest part involves not eating the test pop.
Tips & Common Mistakes
- Weigh your cake crumbs if possible. Consistent moisture gives you smooth rolling.
- Add frosting gradually. Too much frosting turns pops greasy and heavy.
- Chill, do not freeze, before dipping. Frozen centers expand as they warm and can crack the shell.
- Thin the coating. Thick coating drags the ball off the stick.
- Use oil-based color. Water-based color can seize melts.
- Keep water away from coating. Even a drop can thicken it.
- Fix a crack fast. Patch with a dab of warm coating, then redip.
- Keep pops small. One tablespoon scoops set cleaner and stay put on sticks.
- Stir melts often and keep them warm, not hot. Overheating dulls the shine.
- Spin while you tap. Gentle rotation gives a smooth, even finish.
Variations I've Tried
- White chocolate shell with crushed freeze-dried strawberries on top.
- Dark chocolate shell with a light espresso drizzle for mocha vibes.
- Peppermint version with 1/4 teaspoon peppermint oil in the coating and a dusting of crushed candy cane.
- Cheesecake center: press a pea-size cube of chilled cheesecake into the center before rolling.
- Oreo crunch: mix 1/4 cup finely crushed chocolate sandwich cookies into the crumbs.
- Heart shapes: press warm dough into a small heart cutter, lift carefully, then chill before sticking.
How to Serve
Set the cake pops on a tiered stand or tuck each pop into a mini cupcake liner for a tidy look. Pair them with cold milk for kids, cappuccino for brunch, or bubbly for parties. Offer a mix of shells and drizzles so guests can spot their favorite at a glance. Add a small tag if you use nuts or peppermint so everyone picks with confidence.
Make-Ahead and Storage
- Uncoated cake balls: chill up to 3 days in an airtight container, or freeze up to 2 months. Thaw in the fridge overnight, then let them sit 30 minutes before dipping.
- Coated cake pops: store at cool room temp up to 3 days, away from sunlight and heat. For longer storage, refrigerate up to 1 week.
- Freezer: freeze coated pops up to 6 weeks. To prevent condensation, place the closed container in the fridge for 12 hours, then set it on the counter for 30 minutes before opening.
- Best way to serve after chilling: let pops stand at room temp 20 to 30 minutes so the centers soften and the shell tastes snappier. Avoid the microwave, which can spot-melt the coating.
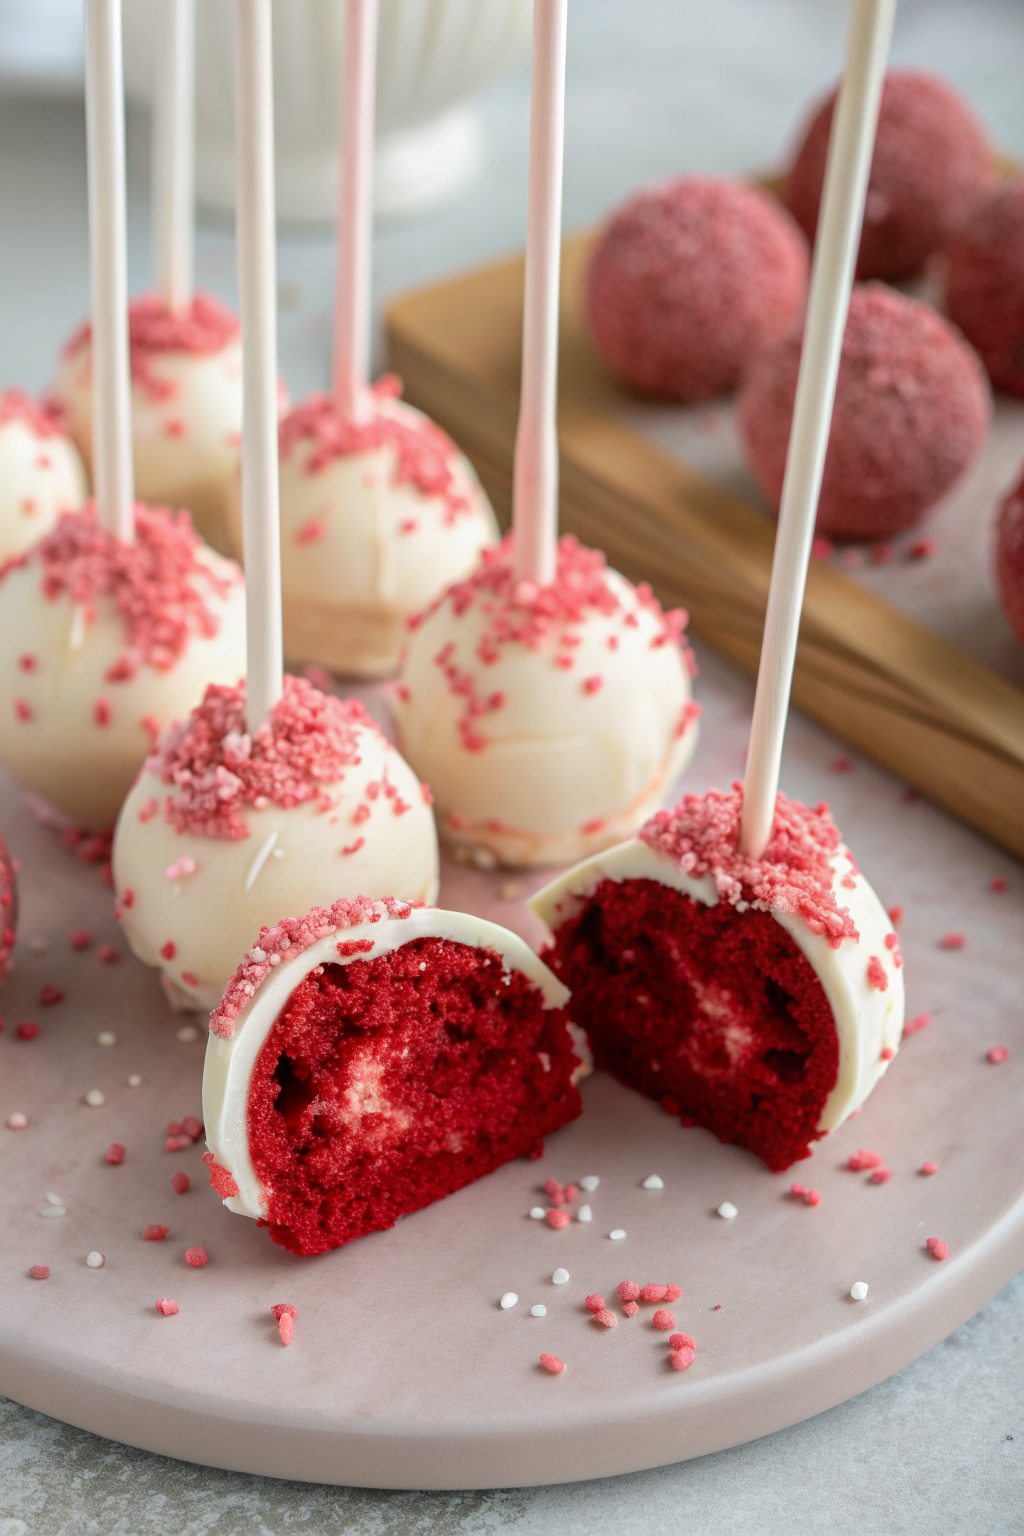
Red Velvet Cake Pops Recipe
Ingredients
Instructions
- Bake a red velvet cake in a 9x13-inch pan according to your recipe or box mix directions, then let it cool completely until no warmth remains.
- Crumble the cooled cake into a large mixing bowl, breaking it into fine, even crumbs and rubbing any larger bits between your palms until sandy.
- Add 1/2 cup cream cheese frosting and a pinch of fine sea salt to the crumbs. Mix with a fork or paddle attachment until evenly combined. Pinch a bit of the mixture; if it holds together cleanly, stop. If it crumbles, add more frosting 1 tablespoon at a time until the mixture forms a smooth, moldable dough.
- Use a 1-tablespoon cookie scoop to portion the mixture into even mounds. Roll each portion between your palms into tight, smooth balls. Aim for about 22 to 26 balls.
- Place the cake balls on a parchment-lined baking sheet and chill for 20 to 30 minutes, until firm but not rock hard.
- Melt about 2 tablespoons of candy coating in a small microwave-safe bowl at 50% power in short bursts, stirring until smooth.
- Dip the tip (about 1/2 inch) of each lollipop stick into the melted coating, then insert the coated end halfway into each chilled cake ball. Return the tray to the refrigerator for about 10 minutes to set the seal.
- Place the remaining candy coating in a microwave-safe bowl. Heat at 50% power in 30-second bursts, stirring between each, until smooth and fully melted. Stir in vegetable shortening or paramount crystals a little at a time until the coating flows like warm yogurt. Keep the bowl slightly warm, such as over a mug of hot water, so the coating stays fluid but not hot.
- Work with 5 to 6 cake pops out of the refrigerator at a time, keeping the rest chilled. Holding a pop by the stick, submerge the cake ball into the coating at a slight angle, ensuring it is fully covered.
- Lift the pop out and gently tap your wrist while slowly rotating the stick so excess coating drips off within 10 to 15 seconds. If using sprinkles or sanding sugar, add them before the shell sets. Use a toothpick to swipe away any tails or drips near the base of the stick if needed.
- Place each dipped pop upright in a styrofoam block or an inverted egg carton to set at room temperature for about 15 minutes, or until the coating is firm and snappy.
- For a drizzle effect, melt a small amount of contrasting candy coating, then drizzle it over the set pops and let it firm up. Serve once fully set, or store according to your preference.
Notes
Approximate per 1 cake pop (about 24 pops): 160 calories; fat 9 g; saturated fat 5 g; carbohydrates 20 g; fiber 0 g; sugars 16 g; protein 2 g; sodium 160 mg. Values will vary based on cake recipe or mix, frosting brand, candy coating type, and exact portion size. Storage: Uncoated cake balls can be chilled up to 3 days or frozen up to 2 months in an airtight container; thaw in the fridge before dipping. Finished cake pops keep at cool room temperature up to 3 days, or refrigerated up to 1 week. For longer storage, freeze up to 6 weeks and defrost gradually in the refrigerator before bringing to room temperature.