
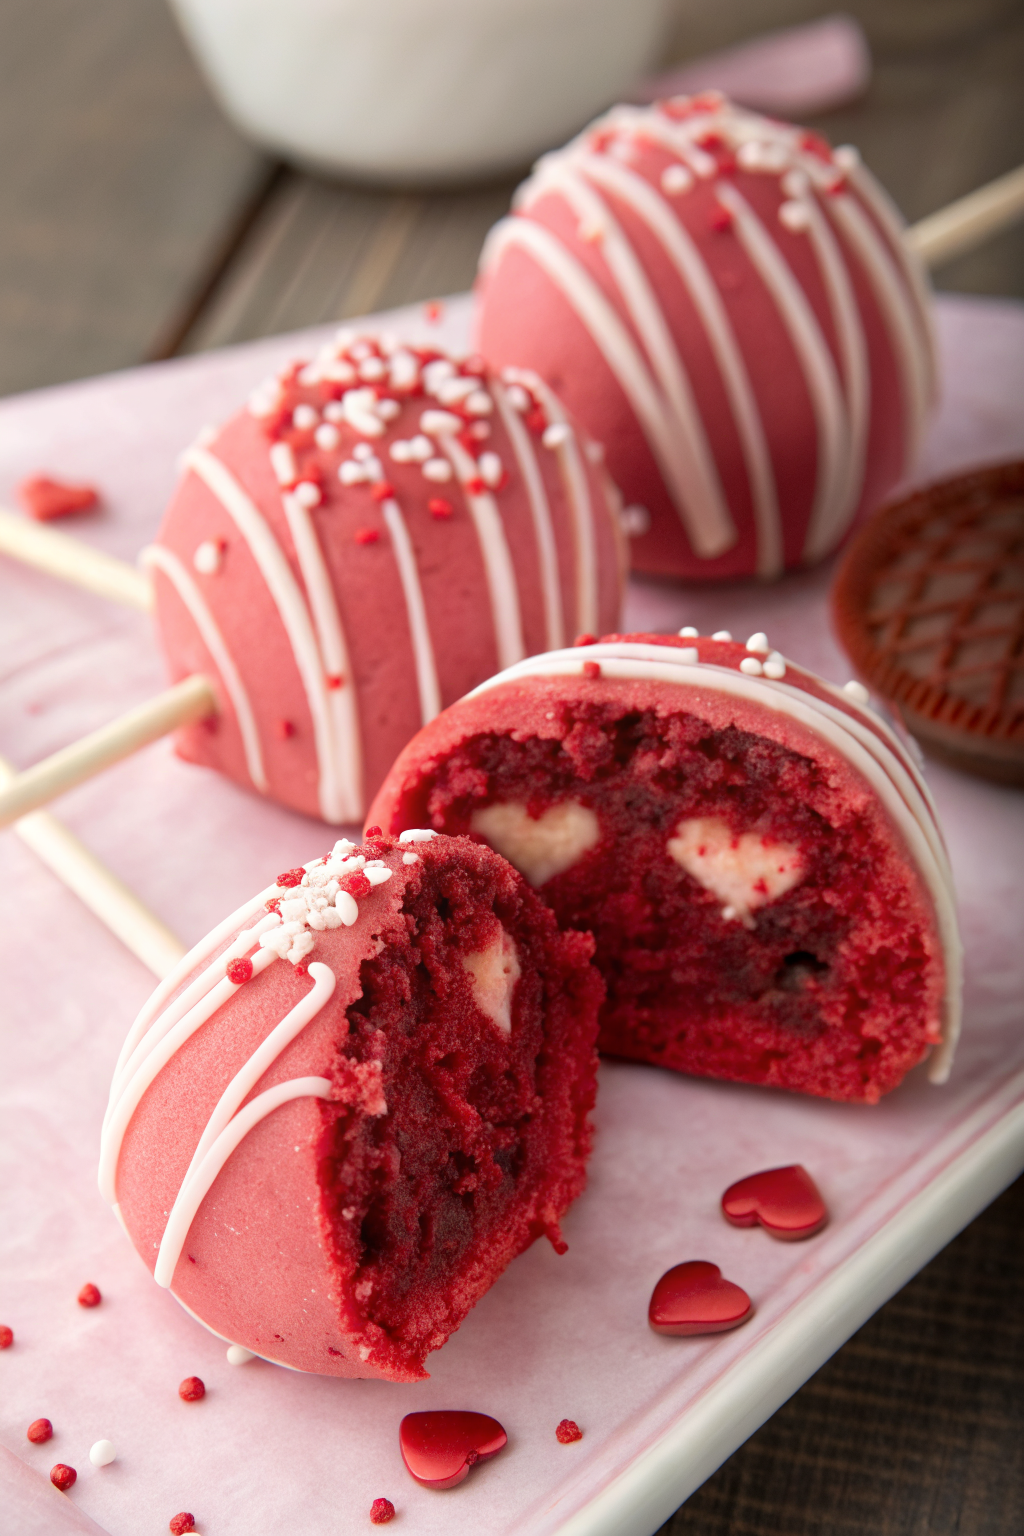
Red Velvet Cake Pops in Heart Shape Recipe tastes like plush cocoa-kissed cake with tangy cream cheese richness under a crisp chocolate shell. It suits date nights, classroom parties, and bake sales, and you can finish a batch in about 2 hours including chill time. I tested more batches than I care to admit, and my family still asks for taste-tests.
Why You Should Try This Red Velvet Cake Pops in Heart Shape Recipe
Red Velvet Cake Pops in Heart Shape Recipe turns bakery-level flavor into cute, portable hearts that always draw a crowd. The texture hits that sweet spot: moist crumb, creamy frosting core, and a clean snap from the chocolate coating. The heart shape reads festive without extra fuss.
You can shape them by hand or press the mixture into a small heart cutter for identical sizes. Kids can help with sprinkling while you handle the hot chocolate. The pops travel well and hold up on dessert tables without slumping.
I served these at a Valentine party and watched the plate vanish in minutes while people asked for the recipe between bites. ★★★★★
Ingredients You’ll Need
- Red velvet cake
- One 9×13 red velvet cake, fully cooled and crumbed (box mix works great; Duncan Hines or Betty Crocker both deliver consistent moisture; a bakery sheet cake also works as a shortcut)
- From-scratch option: use your favorite red velvet recipe baked in a 9×13 pan and cool completely
- Cream cheese frosting
- 1/2 to 3/4 cup frosting, room temp (start with 1/2 cup and add more as needed)
- Homemade quick batch: 4 oz cream cheese, 2 tbsp unsalted butter, 1.5 cups powdered sugar, 1 tsp vanilla, pinch of salt
- Store-bought tub works fine; I like Philadelphia or Betty Crocker for a tangy but balanced flavor
- Coating and color
- 16 to 20 oz candy melts or almond bark in red, white, or pink
- 1 to 2 tsp neutral oil or paramount crystals to thin the coating if needed
- Optional: gel red food color to boost brightness if your crumbs run pale
- Decorations
- Valentine sprinkles, sanding sugar, mini hearts, or colored drizzle chocolate
- Sticks and extras
- 25 to 35 lollipop sticks, 6 inch
- A small 1.5 inch heart cutter for tidy shapes, optional
- Toothpicks for touch-ups
- Equipment
- Mixing bowl, gloves optional
- Sheet pan lined with parchment or a silicone mat
- Cookie scoop, 1 tbsp or 1 oz
- Microwave-safe bowls for melting
- Styrofoam block or cake pop stand for drying
- Small offset spatula or butter knife
How to Make Red Velvet Cake Pops in Heart Shape Recipe
Bake or Buy the Cake
- Bake a 9×13 red velvet cake and cool it to room temp, or buy a plain red velvet sheet cake and skip to crumbling.
- Work with cool cake so the crumbs stay fluffy and not gummy.
Crumble and Mix
- Crumble the cake into a large bowl until you see fine, even crumbs with no big chunks.
- Add 1/2 cup cream cheese frosting and mix with clean hands until the mixture holds together like soft modeling clay.
- Pinch a bit and squeeze it; if it cracks, add frosting 1 tablespoon at a time.
Shape the Hearts
- Scoop level portions with a 1 tbsp or 1 oz scoop for uniform pops.
- Roll each scoop into a ball, then pinch the bottom into a point and press a small indent at the top to shape a heart.
- Or press the mixture into a heart cutter lined with plastic wrap, level the top, and push it out gently.
Chill and Skewer
- Set hearts on a parchment-lined pan and chill 20 to 30 minutes until firm.
- Melt candy melts in 20-second bursts in the microwave, stirring each time until smooth. Thin with a teaspoon of oil if it looks thick.
- Dip the tip of a lollipop stick 1/2 inch into the melted coating, then insert it into the base of each heart. Chill 10 minutes to set the bond.
Dip and Decorate
- Rewarm the coating until fluid and shiny. If it clings, add a touch more oil.
- Hold a pop by the stick, submerge the heart completely, then lift and tap your wrist to shake off excess. Scrape the bottom edge lightly on the bowl rim to prevent a puddle.
- Add sprinkles while the coating still looks wet. For drizzle, pipe melted chocolate from a zip-top bag with a tiny snip.
- Stand pops in a styrofoam block and let them set 10 to 15 minutes, then serve.
Clean Finish and Yield
- Tidy any drips with a paring knife once the coating firms up.
- Expect 24 to 32 pops depending on size and how generously you scoop.
Tips & Tricks
- Use cool, dry cake crumbs so the mixture stays light and not mushy.
- Add frosting gradually; stop when a squeezed portion holds a clean edge without cracks.
- Keep coating at a warm, pourable consistency; thin with oil or paramount crystals for a smooth dip.
- Dip the stick in coating before inserting so it glues into the heart and stays put.
- Work with chilled hearts for clean lines and fewer cracks.
- Tap your wrist instead of the stick to remove excess coating and avoid loosening the bond.
- Sprinkle fast because candy coating sets quickly.
- If the coating looks streaky, stir vigorously to bring back shine and warmth.
- Use a heart cutter for identical sizes when gifting or selling.
What to Serve with Red Velvet Cake Pops in Heart Shape Recipe
These heart-shaped cake pops love company from bubbly drinks like prosecco or a silky latte. Set them on a platter with fresh strawberries and a bowl of whipped cream for dipping the sticks after the last bite. For a kid-friendly spread, pair with cold milk and a fruit tray. If you host a dessert bar, add vanilla bean ice cream and a hot fudge drizzle for extra cheer.
Make-Ahead and Storage
- Make-ahead plan: bake the cake up to 2 days ahead, wrap tight, and refrigerate. Shape hearts up to 1 day in advance and keep them covered in the fridge. Dip the day you serve for the glossiest finish.
- Short-term storage: keep finished pops in an airtight container at cool room temp for 2 days, or refrigerate up to 1 week. Place parchment between layers so decorations stay neat.
- Freezer: freeze undipped hearts up to 2 months, well wrapped. Thaw overnight in the fridge before dipping. You can also freeze finished pops up to 1 month; thaw in the fridge, then let them sit 20 minutes at room temp before serving.
- Skip reheating; the coating will melt. If condensation forms after chilling, let pops air-dry at room temp and the shine will return.
Red Velvet Cake Pops in Heart Shape Recipe
Ingredients
Instructions
- Bake a 9x13 red velvet cake according to package or recipe directions, then cool it completely to room temperature. Alternatively, use a plain bakery red velvet sheet cake.
- Make sure the cake is fully cool so the crumbs stay fluffy instead of gummy.
- Crumble the cooled red velvet cake into a large mixing bowl, breaking it down into fine, even crumbs with no large chunks.
- Add 1/2 cup cream cheese frosting to the crumbs. Mix with clean hands until the mixture holds together like soft modeling clay.
- Pinch a bit of the mixture and squeeze it. If it cracks or falls apart, add frosting 1 tablespoon at a time until it holds a clean edge without cracking.
- Use a 1-tablespoon or 1-ounce cookie scoop to portion the mixture evenly.
- Roll each portion into a smooth ball, then pinch the bottom into a point and press a small indent at the top to form a heart shape.
- Alternatively, line a small heart cutter with plastic wrap, press cake mixture firmly into the cutter, level the top, then gently push the heart out.
- Arrange the heart shapes on a parchment-lined baking sheet in a single layer.
- Chill the hearts in the refrigerator for 20 to 30 minutes, until firm to the touch.
- Place candy melts or almond bark in a microwave-safe bowl. Melt in 20-second bursts, stirring after each interval, until smooth and fluid. If the coating is thick, stir in 1 teaspoon neutral oil and add more as needed.
- Dip the tip of each lollipop stick about 1/2 inch into the melted coating, then insert it into the base of a chilled heart. Repeat with remaining hearts.
- Return the tray to the refrigerator and chill for about 10 minutes to set the stick bond.
- Rewarm the candy coating briefly if needed, stirring until smooth and shiny. Thin with a tiny bit more oil if it feels too thick.
- Holding a cake pop by the stick, submerge the heart completely in the melted coating. Lift it out and gently tap your wrist (not the stick) to shake off excess coating. Lightly scrape the bottom edge of the heart on the rim of the bowl to prevent a puddle from forming.
- While the coating is still wet, immediately add sprinkles, sanding sugar, or mini hearts as desired.
- For a drizzle effect, place melted colored chocolate in a small zip-top bag, snip a tiny corner, and drizzle over the set pops.
- Stand each dipped pop upright in a styrofoam block or cake pop stand and let them set at room temperature for 10 to 15 minutes, until firm.
- Once the coating has fully set, tidy any drips or excess coating with a small paring knife if needed.
- Serve the heart-shaped cake pops on a platter or display stand. Enjoy within a few days for the best texture and flavor.
Notes
Approximate per 1 cake pop (about 1 of 28): 160 calories; fat 8 g; saturated fat 4 g; carbohydrates 22 g; fiber 0 g; sugars 16 g; protein 2 g; sodium 160 mg. Values are estimates and will vary based on cake brand, frosting type, coating used, decorations, and exact portion size. Make-Ahead and Storage
Bake the red velvet cake up to 2 days ahead, wrap tightly, and refrigerate until ready to crumble. Shape the hearts up to 1 day in advance and keep them covered in the refrigerator. For the glossiest finish, dip and decorate on the day you plan to serve. Store finished cake pops in an airtight container at cool room temperature for up to 2 days or refrigerate for up to 1 week, separating layers with parchment to protect decorations. Undipped hearts can be frozen for up to 2 months; thaw in the refrigerator before dipping. Finished cake pops may be frozen for up to 1 month and thawed in the refrigerator, then brought to room temperature for about 20 minutes before serving.