
Onigirazu Recipe has become one of my favorite quick meals to whip up when I want something tasty but fuss-free. If you haven’t tried this Japanese rice sandwich yet, you’re in for a treat. It’s like sushi’s laid-back cousin who’s way easier to handle and just as satisfying. Let me walk you through why this recipe deserves a spot in your kitchen rotation.
Why You Should Try This Onigirazu Recipe
Onigirazu stands out because it’s super versatile and perfect for any meal breakfast, lunch, or even a picnic snack. Unlike traditional onigiri, which requires some skill to shape, onigirazu is more forgiving. You just wrap your fillings in rice and seaweed like a little parcel. It’s a fantastic way to use up leftovers or experiment with flavors without worrying about perfect shaping.
I love how it combines the comforting texture of rice with whatever fillings you fancy. It’s portable, filling, and doesn’t get soggy quickly. Plus, it’s a fun way to get creative in the kitchen without spending hours.
Mistakes to Avoid
- Overfilling: It’s tempting to pile on the goodies, but too much filling makes wrapping tricky.
- Using dry rice: Sushi rice needs to be sticky but not mushy. Under or overcooked rice can ruin the texture.
- Wrapping too tightly: You want it snug but not squashed.
- Forgetting to season the rice: Plain rice tastes bland and misses that signature sushi vibe.
- Cutting with a dull knife: A sharp blade prevents squashing and keeps the layers intact.
Ingredients You’ll Need
Here’s a simple list to get you started. Feel free to adjust quantities based on how many onigirazu you want to make:
- Sushi rice (short-grain rice), cooked and slightly cooled – about 2 cups
- Nori sheets (seaweed)
- Your choice of fillings (protein, veggies, sauces)
- Rice vinegar, sugar, and salt (to season the rice)
- Optional: sesame seeds for garnish
Seasoning the rice properly makes a big difference. I usually mix 2 tablespoons rice vinegar, 1 tablespoon sugar, and 1 teaspoon salt into the cooked rice while it’s still warm.
How to Make Asian Chicken Salad
- Lay a sheet of plastic wrap on your work surface, then place a nori sheet on top.
- Spread a thin layer of seasoned sushi rice over half the nori, leaving some edges clear.
- Add your fillings in the center don’t overstuff or it’ll be hard to wrap.
- Spread another thin layer of rice over the fillings.
- Fold the nori over the rice and fillings like wrapping a present, using the plastic wrap to help shape it tightly.
- Let it rest for a few minutes so the nori softens slightly.
- Slice in half with a sharp knife and enjoy!
The plastic wrap helps keep everything neat and makes the folding process easier. I learned this trick after a few messy attempts!
Pro Tips
- Use slightly warm rice; cold rice can be harder to mold.
- Don’t add too much filling or the onigirazu will fall apart.
- If you want a crispier nori, assemble just before eating.
- Experiment with layering sauces inside for extra flavor bursts.
- Keep a damp cloth nearby to wipe your hands rice can get sticky!
Substitutions & Variations
One of the best things about onigirazu is you can switch up the fillings endlessly. Here are some ideas that have worked well for me:
- Protein swaps: Grilled chicken, tofu, smoked salmon, or even leftover roast beef.
- Veggie options: Avocado, cucumber, pickled radish, or sautéed mushrooms.
- Sauce ideas: Soy sauce, spicy mayo, teriyaki glaze, or even a dab of wasabi for a kick.
- Rice alternatives: Brown rice or mixed grain rice if you want something heartier.
Serving
Okay, sticking to onigirazu here again! These little rice sandwiches pair well with simple sides like miso soup, pickled vegetables, or a fresh green salad. They also make excellent lunchbox fillers. If you want to go all out, serve with a dipping sauce like soy sauce mixed with a touch of wasabi or a tangy ponzu.
Leftovers and Storage Tips
If you have leftovers, wrap each onigirazu tightly in plastic wrap and store them in the fridge. They usually keep well for up to 24 hours. Avoid making them too far in advance because the nori can get soggy over time. When you’re ready to eat, let them come to room temperature or give them a quick warm-up in the microwave for about 20 seconds, but keep an eye on the nori so it doesn’t get too chewy.
If you want to prep ahead for a picnic or lunch, assembling them the same day is best. Otherwise, store the fillings separately and assemble just before eating for the freshest taste.
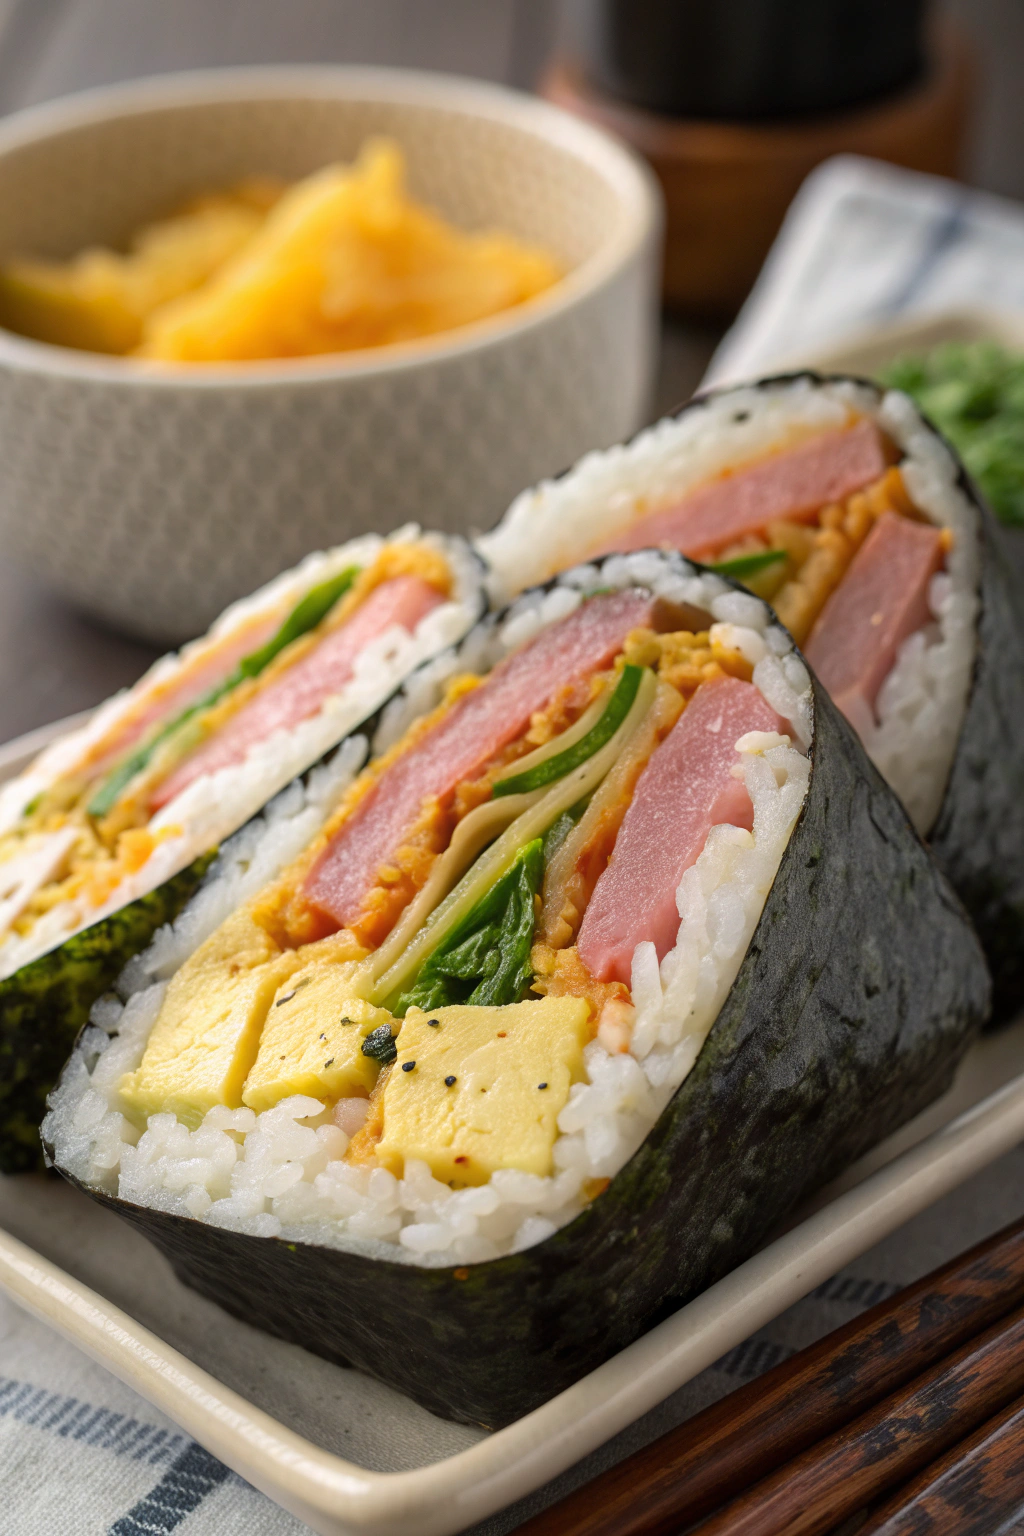
Onigirazu
Ingredients
Instructions
- Place a sheet of plastic wrap on a flat surface.
- Lay one sheet of nori on the plastic wrap.
- Wet your hands and spread about 1 cup of cooked sushi rice in the center of the nori sheet into a square shape.
- Add your chosen protein, vegetables, and mayonnaise or sauce on top of the rice.
- Spread another 1 cup of rice over the filling to cover it.
- Fold the corners of the nori over the rice and filling to form a neat square package.
- Wrap the plastic wrap tightly around the onigirazu to secure it.
- Let it rest for a few minutes, then cut in half and serve.