
No Bake chocolate Snowman cake pops Recipe brings wintry charm to any dessert table without touching the oven. I roll a rich cookie truffle base, dunk each pop in snowy white chocolate, and add cute carrot noses and cozy scarves. Kids cheer when I set these out, and grown ups magically turn into kids again. You can prep the parts ahead, then decorate when you want a fun hands on project.
Why This No Bake chocolate Snowman Cake Pops Recipe
You chill the dough and skip baking, so you save time and keep the kitchen cool. The cookie and cream cheese base tastes like brownie batter, and the white shell gives you a smooth canvas for snowman faces. These pops travel well for parties and wrap up sweetly for gifts.
I tested different coatings and found a simple method that keeps the pops smooth and crack free. The decorations invite creativity, and you can keep them simple or go all out. I serve them at cookie swaps, and they always disappear first.
Ingredients You’ll Need
Base
- 36 chocolate sandwich cookies about 400 g
- 170 g cream cheese softened
- 1 tsp vanilla extract
- Pinch of fine salt
Coating and decor
- 680 g white candy melts or white coating chocolate
- 2 tsp neutral oil or 1 to 2 tsp cocoa butter or shortening for thinning as needed
- 30 g dark chocolate or black candy melts for eyes and smiles
- Mini chocolate chips for coal eyes and buttons
- Orange mini candies or orange sprinkle rods for carrot noses
- Red and green candy melts for scarves or ear muffs
- White sanding sugar optional for snowy sparkle
- Lollipop sticks 24 to 30
- Pretzel sticks for little arms optional
Tools
- Food processor or zip top bag and rolling pin
- Mixing bowl and spatula
- Cookie scoop about 1 tbsp size
- Parchment lined tray
- Styrofoam block or a box with holes for drying
- Small piping bags or zip top bags
- Toothpicks and tweezers optional for tidy decorating
How to Make No Bake chocolate Snowman Cake Pops
Make the base
- Crush the cookies to fine crumbs in a food processor. You can also seal them in a zip top bag and crush with a rolling pin until sandy.
- Stir the crumbs with cream cheese, vanilla, and salt in a bowl. Mix until the dough turns smooth and fudgy.
- Scoop level portions and roll tight balls about 1 inch wide. Set them on a parchment lined tray.
- Chill the tray for 20 to 30 minutes until the balls feel firm. Cold dough holds a stick better and dips cleanly.
Stick and chill
- Melt a small amount of white coating in a microwave safe bowl at half power in 20 to 30 second bursts. Stir until smooth.
- Dip the tip of each lollipop stick into the melted coating and insert it halfway into a chilled ball. Set the tray back in the fridge for 10 minutes so the seal sets.
Dip and decorate
- Melt the remaining white coating in a deep bowl at half power in short bursts. Stir well and thin with neutral oil or a little cocoa butter until it flows like warm yogurt.
- Dip one pop straight down and pull it up. Gently tap the stick on the bowl edge and twirl to shed excess coating.
- While the coating stays wet, dust with white sanding sugar if you want extra sparkle. Plant the stick in a styrofoam block so the pop can dry with a smooth finish.
- For faces, press two mini chocolate chips for eyes and one orange candy for a nose. Add small bits of black sprinkle or pipe melted dark chocolate for a smile.
- For scarves or ear muffs, melt colored candy melts and pipe a thin scarf line around the head, then add dots for tassels or ear pads with a candy band across the top.
- Let the decorations set at room temperature for 20 minutes or chill for 5 minutes. Keep dipping and decorating in batches so the coating stays fluid.
Pro Tips
I chill the shaped dough well so the sticks stay secure during dipping. I also keep the pops small, about 20 g each, so they dip clean and do not crack. A deep narrow bowl of coating gives you easier coverage than a wide shallow bowl.
I test the coating flow by lifting a spoon and watching it ribbon back into the bowl. If it looks thick, I stir in a tiny splash of neutral oil and test again. I also keep a toothpick handy to pop tiny surface bubbles before the coating sets.
Work with a few pops out of the fridge at a time. Cold pops dip smoothly, but very cold pops can make the coating set too fast. Aim for cool and firm, not icy.
Variations
- Use gluten free chocolate sandwich cookies for a gluten friendly batch.
- Swap vegan cream cheese and dairy free coating if you need a dairy free option.
- Add 1 tsp peppermint extract to the base for a mint twist. Sprinkle crushed candy cane on the wet coating for crunch.
- Roll oval shapes for a snowman head with a long carrot nose. Add a chocolate top hat by gluing a chocolate wafer to a chocolate disc with a dot of melted coating.
- Make double decker snowmen by stacking a small head on a slightly larger body. Use extra sticks and chill the stack well so it holds steady.
Mistakes to Avoid
- Do not rush the chill time. Warm dough slides off sticks and causes messy dips.
- Do not overheat the coating. Scorched chocolate turns thick and grainy, and you lose that smooth finish.
- Do not skip thinning if the coating looks heavy. A thin flow gives you a tidy shell and fewer drips.
What to Serve with No Bake chocolate Snowman Cake Pops
I brew hot cocoa and pass a tray of these pops for an instant holiday dessert board. The creamy centers pair well with citrus tea and coffee too. I often set out bowls of crushed peppermint, coconut, and sprinkles so guests can decorate their own pop.
For a party platter, add vanilla bean marshmallows, chocolate covered pretzels, and fresh berries. A drizzle of raspberry sauce on the plate adds color and a bright finish. Kids love a toppings bar, and adults enjoy the creative break.
Leftovers and Storage
I store finished pops in an airtight container at cool room temperature for 3 days. If your kitchen runs warm, move them to the fridge, then bring them to room temp before serving. The shell tastes best when it softens slightly.
You can freeze undipped balls for 2 months. Thaw them in the fridge overnight before dipping. I avoid freezing decorated pops, since moisture can spot the white shell.
Nutrition Information
Per pop estimate based on 24 pops
- Calories 210
- Fat 12 g
- Saturated fat 7 g
- Carbs 25 g
- Sugars 19 g
- Protein 2 g
- Sodium 120 mg
I estimate these values. Your numbers vary by brand and pop size.
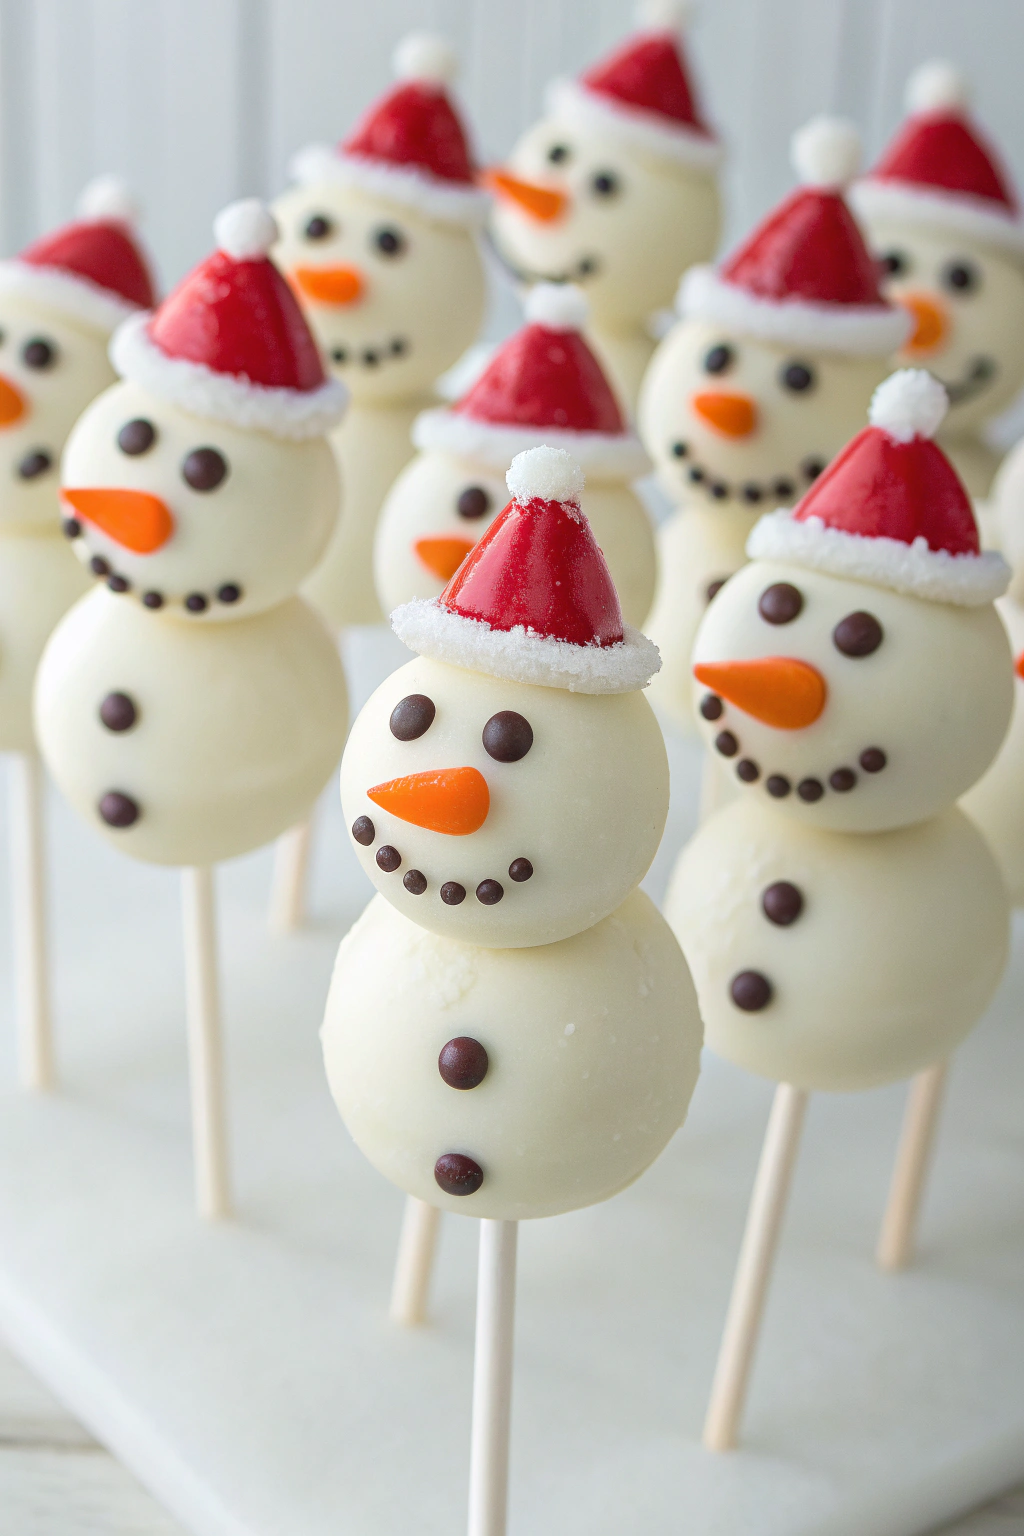
No Bake Chocolate Snowman Cake Pops
Ingredients
Instructions
- Mix the chocolate cake crumbs with the softened cream cheese until well combined.
- Shape the mixture into small snowman shapes or balls stacked in snowman form.
- Melt the chocolate chips and candy melts according to package instructions.
- Insert lollipop sticks into the cake pops.
- Dip each cake pop into the melted white chocolate to coat evenly.
- Decorate immediately with mini chocolate chips, colored icing, or edible markers to create snowman faces and details.
- Allow to set at room temperature or in the refrigerator until firm.
- Serve and enjoy.