
Homemade Oreo Cookies Recipe gives you crisp, ultra-chocolate wafers with a creamy vanilla filling that snaps and melts in all the right ways. It suits bakers who love a classic chocolate sandwich cookie, takes about 1 hour 30 minutes start to finish, and rewards a little patience. I used to trade my lunch snack for the store-bought ones, so this version feels like sweet payback.
Why Choose This Homemade Oreo Cookies Recipe
This Homemade Oreo Cookies Recipe delivers deep cocoa flavor with clean ingredients and a filling that sets firm, not gloopy. You mix, chill, roll thin, and bake to a crisp bite that holds up to dunking.
Black cocoa brings the iconic color and taste, while a touch of Dutch cocoa rounds the flavor so it reads chocolate, not ash. The filling uses a butter-shortening combo to keep structure at room temp, just like the classic, yet it still tastes fresh.
Tastes like the cookie aisle went to pastry school, and the texture snaps just right. ★★★★★
Ingredients You Need
Yields about 30 sandwich cookies
-
Chocolate wafers
- 1 1/4 cups all-purpose flour (150 g)
- 3/4 cup granulated sugar (150 g)
- 1/3 cup black cocoa powder (35 g) — I like King Arthur; sub Dutch-process cocoa if needed
- 1/4 cup Dutch-process cocoa powder (25 g) — Valrhona or Guittard give great flavor
- 1/2 teaspoon baking soda
- 1/2 teaspoon fine sea salt
- 8 tablespoons unsalted butter, room temp (113 g) — standard sticks work; European butter tastes richer
- 1 teaspoon vanilla extract
- 2 tablespoons milk (30 ml) — add 1 more if the dough looks dry
- 1/2 teaspoon instant espresso powder, optional — boosts chocolate without tasting like coffee
- Pantry shortcut: no black cocoa on hand? Use all Dutch cocoa and add an extra pinch of espresso powder
-
Vanilla creme filling
- 4 tablespoons unsalted butter, room temp (56 g)
- 4 tablespoons vegetable shortening, room temp (48 g) — Crisco holds the structure like the classic
- 3 cups powdered sugar, sifted (360 g)
- 1 teaspoon vanilla extract
- Pinch fine sea salt
- 1 to 2 teaspoons milk, only if needed for piping consistency
- Shortcut: in a pinch, use a thick store-bought vanilla frosting and beat in a little powdered sugar for stiffness
-
Equipment
- Stand mixer or hand mixer
- Two baking sheets and parchment
- Rolling pin
- 2-inch round cutter (or small jar lid)
- Wire rack
- Piping bag or zip-top bag
- Offset spatula and ruler for measuring dough thickness
How to Make Homemade Oreo Cookies Recipe
Preheat and prep (10 minutes)
- Heat the oven to 325°F and line two baking sheets with parchment.
- Measure ingredients. Cocoa compacts, so scoop gently or weigh for accuracy.
Make the chocolate dough (8 minutes)
- Beat butter and sugar on medium speed until combined and slightly fluffy, about 2 minutes.
- Add vanilla and espresso powder. Mix to combine.
- Whisk flour, both cocoas, baking soda, and salt in a separate bowl. Add to the mixer and blend on low until sandy.
- Drizzle in milk until the dough clumps and holds together. It should feel soft but not sticky.
Chill and roll (20 minutes)
- Flatten the dough into two disks and chill 15 minutes to make rolling easier.
- Roll one disk between two sheets of parchment to 1/8 inch thick. Keep the second disk in the fridge so it stays firm.
Cut and bake (12 to 14 minutes per batch)
- Cut 2-inch rounds and place them 1 inch apart on the sheets. Lightly prick each round with a fork to prevent puffing.
- Bake 12 to 14 minutes until the cookies look dry on top and the edges feel set. Rotate the pan once at the halfway point.
- Cool on the sheet 5 minutes, then move cookies to a rack. They crisp more as they cool.
Make the vanilla filling (5 minutes)
- Beat butter and shortening until smooth and creamy, about 1 minute.
- Add powdered sugar, vanilla, and salt. Mix on low until it looks like wet sand, then beat on medium until thick and fluffy.
- If the filling looks too stiff for piping, add milk 1/2 teaspoon at a time.
Assemble the cookies (10 minutes)
- Pair wafers by size. Pipe a 1-inch dollop of filling onto the bottom cookie.
- Cap with a second cookie and twist gently to spread the filling to the edge.
Set and stash (30 minutes)
- Let the cookies sit at cool room temp for 30 minutes so the filling firms up.
- Enjoy now or store as noted below.
Tips & Common Mistakes
- Weigh cocoa and flour or spoon and level to prevent dry, crumbly dough.
- Roll to 1/8 inch for a true snap. Thicker dough bakes chewy, not crisp.
- Keep the dough cool. Warm dough spreads and loses that sharp edge.
- Bake until fully dry at the surface. Underbaked wafers soften fast.
- Use black cocoa for color and that signature taste. If you only use Dutch cocoa, expect a lighter look and milder bite.
- Do not overcream butter and sugar. A slight fluff is enough and prevents spread.
- Prick the rounds with a fork to limit puffing.
- Aim for a firm filling. Add milk only if your piping tip refuses to move it.
- Pair cookie sizes before piping. You get neater sandwich edges.
Variations I've Tried
- Double-stuf: Pipe a thicker layer or stack two thin layers of filling.
- Mint: Add 1/2 teaspoon peppermint extract to the filling and a touch of green gel color.
- Peanut butter: Swap half the powdered sugar for peanut butter powder, or blend 2 tablespoons smooth peanut butter into the filling.
- Mocha: Add 1 teaspoon espresso powder to both dough and filling.
- Gluten-free: Use a 1:1 gluten-free baking flour and chill the dough 10 extra minutes.
- Dairy-free: Use plant butter and all shortening in the filling. Check that your cocoa and flour blend fit your needs.
How to Serve
Dunk them in cold milk for the classic move, or serve with hot coffee if you like contrast. Crumble a few over vanilla ice cream or swirl them into a milkshake for extra cookie goodness. Layer crushed wafers into parfaits or press them into a cheesecake crust. I also pack a few in lunch boxes because a cookie that still snaps at noon feels like a small win.
Make-Ahead and Storage
- Unfilled wafers: Store airtight at room temp up to 1 week or freeze up to 2 months. To revive crispness, warm wafers on a parchment-lined sheet at 300°F for 4 to 5 minutes and cool completely.
- Filled cookies: Keep airtight at room temp for 3 days in a cool spot. Refrigerate up to 1 week or freeze up to 2 months. Thaw in the fridge, then let them sit at room temp 10 minutes before serving.
- Dough: Chill disks up to 48 hours or freeze up to 2 months. Thaw in the fridge until rollable.
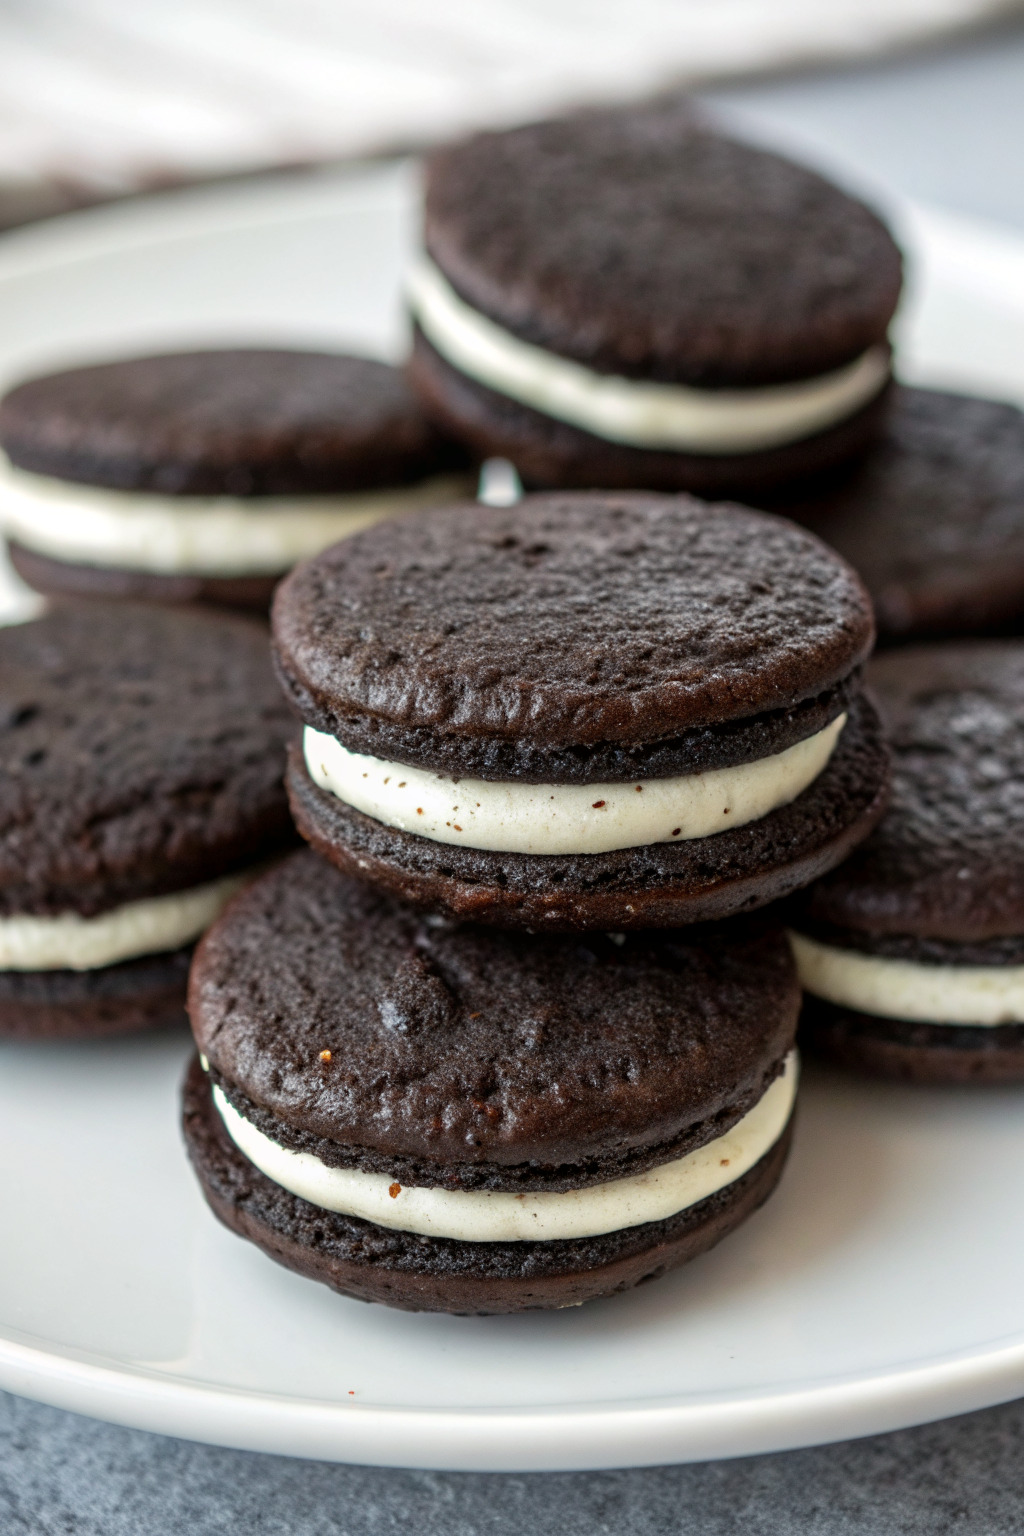
Homemade Oreo Cookies Recipe
Ingredients
Instructions
- Preheat the oven to 325°F (165°C) and line two baking sheets with parchment paper.
- Measure all ingredients, taking care to spoon and level the flour and cocoa or weigh them for accuracy.
- In a mixing bowl, beat the butter and granulated sugar on medium speed until combined and slightly fluffy, about 2 minutes.
- Add the vanilla extract and instant espresso powder (if using) and mix to combine.
- In a separate bowl, whisk together the flour, black cocoa powder, Dutch-process cocoa powder, baking soda, and salt.
- Add the dry ingredients to the butter mixture and blend on low speed until the mixture looks sandy.
- Drizzle in the milk and mix just until the dough clumps together and holds when pressed. It should feel soft but not sticky.
- Divide the dough into two portions, flatten each into a disk, and chill for about 15 minutes to firm slightly.
- Roll one disk at a time between two sheets of parchment to about 1/8 inch thick, keeping the second disk in the refrigerator until needed.
- Using a 2-inch round cutter, cut out cookies and place them about 1 inch apart on the prepared baking sheets.
- Lightly prick each round with a fork to help prevent puffing.
- Bake for 12 to 14 minutes, rotating the pans halfway through, until the cookies look dry on top and the edges feel set.
- Cool the cookies on the baking sheet for 5 minutes, then transfer to a wire rack to cool completely. They will crisp as they cool.
- In a clean bowl, beat the butter and shortening together until smooth and creamy, about 1 minute.
- Add the powdered sugar, vanilla extract, and a pinch of salt. Mix on low speed until the mixture looks like wet sand, then increase to medium and beat until thick and fluffy.
- If the filling is too stiff to pipe, add milk 1/2 teaspoon at a time just until it reaches a firm but pipeable consistency.
- Pair the cooled chocolate wafers by similar size.
- Pipe a small dollop (about 1 inch wide) of filling onto the bottom side of one cookie in each pair.
- Top with the second cookie and twist gently to spread the filling to the edges.
- Let the assembled cookies sit at cool room temperature for about 30 minutes so the filling can firm up.
- Enjoy right away or store in an airtight container as desired.
Notes
Approximate per 1 sandwich cookie (1 of 30): 160–180 calories; fat 8–9 g; saturated fat 4–5 g; carbohydrates 23–25 g; fiber 1 g; sugars 16–18 g; protein 1–2 g; sodium 80–120 mg. Values will vary based on exact ingredients, cocoa brands, and cookie size. Storage
Unfilled wafers: Store airtight at room temperature up to 1 week or freeze up to 2 months. To refresh crispness, warm on a parchment-lined baking sheet at 300°F for 4–5 minutes, then cool completely.
Filled cookies: Store airtight at cool room temperature for up to 3 days, refrigerate up to 1 week, or freeze up to 2 months. Thaw in the refrigerator, then let sit at room temperature about 10 minutes before serving.