
Christmas Peppermint Pie Recipe brings cool mint, creamy filling, and a crunchy chocolate crust to the holiday table with zero oven time. I make this every December, and the first slice always disappears before I set out plates. The texture stays silky, the flavor hits that perfect candy cane vibe, and the colors look festive without much fuss. If you can whip cream and crush cookies, you can pull this off.
Why You Should Try This Christmas Peppermint Pie Recipe
You get a holiday dessert that tastes like peppermint bark in pie form, and you do not need to turn on the oven. The filling sets up creamy and sliceable, and the crushed candies add a gentle crunch that keeps every bite interesting. The pie also handles travel well, so you can bring it to a party without stress. I make it the night before, then I stroll in with a chilled pie that steals the spotlight.
I also love how flexible the base feels. You can switch the crust, adjust the mint level, or swirl in a little color for a candy stripe effect. Kids go for the pink tint, while adults ask for the stronger mint version. Either way, the pie finishes fast.
Ingredients You’ll Need
The crust
- 24 chocolate sandwich cookies, crushed fine, about 2 cups crumbs
- 5 tablespoons unsalted butter, melted
- Pinch of fine salt
The filling
- 8 ounces cream cheese, softened
- 3 4 cup powdered sugar
- 1 teaspoon pure peppermint extract, adjust to taste
- 1 teaspoon vanilla extract
- Pinch of fine salt
- 1 and 1 2 cups cold heavy cream
- 1 cup marshmallow creme or thawed whipped topping
- 1 2 cup crushed peppermint candies or candy canes, plus extra for topping
- 2 to 3 drops red gel food color, optional for a pink swirl
Topping
- 1 cup softly whipped cream or whipped topping
- Extra crushed peppermint candies
- Chocolate curls or shaved chocolate, optional
How to Make Christmas Peppermint Pie
- Prep the crust
Add cookie crumbs, melted butter, and salt to a bowl. Stir until the crumbs look evenly moistened. Press the mixture firmly into a 9 inch pie plate, going up the sides. Chill the crust while you make the filling. - Whip the cream
Pour cold heavy cream into a chilled bowl. Beat until stiff peaks form that hold their shape. Set the bowl in the refrigerator while you mix the rest. - Make the peppermint base
Beat cream cheese, powdered sugar, peppermint extract, vanilla, and salt until smooth and fluffy. Fold in marshmallow creme until the mixture looks silky. Taste and adjust the mint level with a drop more extract if needed. - Fold and color
Gently fold the whipped cream into the peppermint base until no streaks remain. Sprinkle in the crushed candies and fold again. If you want a pink swirl, add a few dots of red color and fold two or three times to marble it. - Fill and chill
Spoon the filling into the chilled crust and smooth the top. Cover loosely and chill for at least 6 hours, or overnight for the cleanest slices. The fridge does all the work while you relax. - Finish and serve
Top with whipped cream, more crushed candies, and chocolate curls. Warm a knife in hot water, wipe it dry, then slice for neat edges. Serve cold and watch the smiles happen.
Variations and Substitutions
- Use a graham cracker crust for a lighter flavor, or a chocolate wafer crust for extra cocoa notes.
- Swap marshmallow creme for thawed whipped topping if you prefer a lighter texture.
- Go gluten free with gluten free chocolate cookies in the crust.
- Add mini chocolate chips for extra crunch, about 1 2 cup.
- Swirl in hot fudge before chilling for a peppermint mocha feel.
- Trade crushed candies for peppermint baking chips if you want less crunch.
- For a stronger mint profile, increase peppermint extract by a quarter teaspoon at a time.
Pro Tips
- Crush candies fine to keep the filling creamy, and add them last so they do not melt into the mixture.
- Chill your mixing bowl and beaters, and keep the cream cold for fast, stable peaks.
- Fold gently with a spatula so you keep the volume from the whipped cream.
- Use a hot, dry knife for tidy slices, and wipe between cuts.
- Mix the filling until smooth before you add whipped cream to avoid lumps.
- Make it a day ahead, since an overnight chill sets the texture perfectly.
What to Serve with Christmas Peppermint Pie
- Hot cocoa or mochas pair well with peppermint and chocolate.
- Strong coffee balances the creamy sweetness.
- Fresh berries add color and a tart contrast.
- A drizzle of warm chocolate sauce or ganache turns each slice into a showpiece.
- Add a small bowl of extra crushed candies so guests can sprinkle their own.
Mistakes to Avoid
- Do not overdo the mint extract, since peppermint grows stronger as the pie chills.
- Do not skip the chill time, because the filling needs hours to set.
- Do not crush candies into dust, or they can melt into the cream and stain it.
- Do not over mix after you add whipped cream, or you will deflate the filling.
- Do not leave the pie at room temperature for long, since the texture softens.
Leftovers and Storage Tips
I store the pie covered in the refrigerator and keep toppings on the side for the neatest slices. The texture holds best when cold, and the mint flavor stays fresh for days. I slice what I need, then pop the rest back into the fridge right away.
- Refrigerator
Keep covered for 3 to 4 days. - Freezer
Wrap the whole pie tightly, or freeze slices on a sheet pan then wrap. Freeze for up to 1 month. - Thaw
Set in the refrigerator for several hours until it slices cleanly. Add fresh whipped cream and candies after thawing to keep the toppings crisp.
Nutrition Information
Approximate per slice, based on 10 slices
- Calories 430
- Fat 29 g
- Saturated Fat 17 g
- Carbohydrates 40 g
- Sugar 29 g
- Protein 4 g
- Sodium 230 mg
Values will vary based on ingredient brands and toppings.
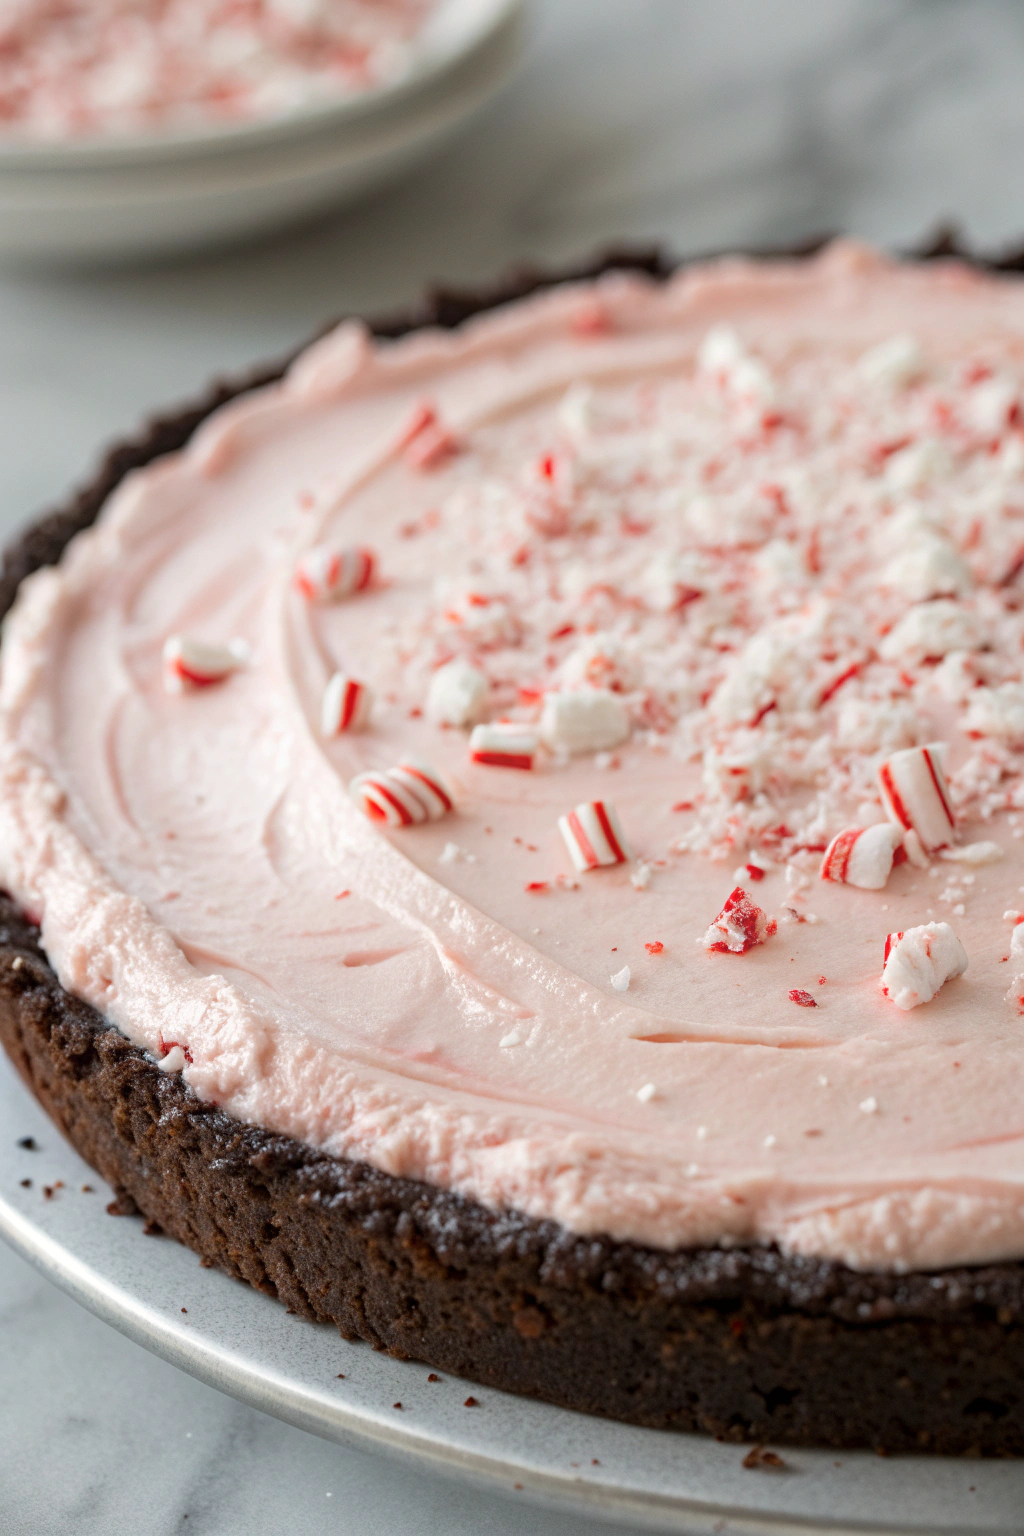
Christmas Peppermint Pie Recipe
Ingredients
Instructions
- In a mixing bowl, beat the cream cheese until smooth.
- Add powdered sugar and peppermint extract; mix until well combined.
- Fold in the whipped topping gently.
- Spread the mixture evenly over the oreo crust.
- Sprinkle crushed candy canes on top.
- Chill in the refrigerator for at least 2 hours before serving.