
Pink Bow Cake Pops Recipe hits that sweet spot between tender vanilla cake truffle and crisp candy shell, with a cute pink bow that adds a little ta-da. It suits birthdays, baby showers, and bake sales, and you can finish a batch in about 1 hour 45 minutes. I once piped bows in a hotel room before a bridal shower, and a coffee mug doubled as my stand.
Why You Should Try This Pink Bow Cake Pops Recipe
This Pink Bow Cake Pops Recipe delivers bakery-level results with simple steps and budget-friendly pantry shortcuts. The shell snaps, the center stays moist, and the pink bows turn a plain pop into a party favor. Kids love the color and size, and adults always ask how you made them so smooth.
These pink bow cake pops stole the show at our baby shower and vanished faster than the gift wrap ★★★★★
Ingredients You’ll Need
- 1 baked 9 by 13 vanilla cake, cooled completely (boxed mix works great; follow the box for eggs, oil, and water)
- 3/4 to 1 cup vanilla buttercream frosting (store brand works; add a little at a time so the mixture stays fudgy, not wet)
- 16 ounces pink candy melts or coating wafers (Wilton, Ghirardelli, or Merckens), plus 1 to 2 teaspoons refined coconut oil or paramount crystals to thin if needed
- 4 ounces white candy melts for bows, or royal icing, or pre-made sugar bows for a shortcut
- Gel food color in pink if you want to tweak the shade
- Sprinkles, sanding sugar, or edible glitter, optional
- 18 to 24 lollipop sticks, 6 inch
- 1 teaspoon oil-based candy color, optional for deeper pink
Pantry shortcuts and swaps:
- Use bakery cake if you need speed.
- Swap chocolate cake and chocolate coating for a cocoa spin.
- Dairy-free frosting and dairy-free melts work if you need an allergy-friendly version.
Equipment:
- Mixing bowl and hand mixer or stand mixer
- Cookie scoop, 1 tablespoon size
- Baking sheet lined with parchment
- Microwave-safe dipping cups or tall mugs
- Piping bag with small round tip size 2 or a zip-top bag
- Toothpicks and a small offset spatula
- Styrofoam block or a cake pop stand
How to Make Pink Bow Cake Pops Recipe
Crumble and mix
- Break the cooled cake into fine crumbs in a large bowl.
- Add 3/4 cup frosting and mix until the crumbs feel like moldable cookie dough.
- Pinch a bit of the mixture. If it cracks, add a spoon of frosting and mix again.
Scoop, roll, and chill
- Scoop level balls using a 1 tablespoon scoop.
- Roll each portion between your palms until smooth and round.
- Place on a parchment-lined sheet, cover, and chill 20 to 30 min.
Prep the coating
- Melt pink candy melts in a microwave-safe cup in 20 to 30 sec bursts, stirring between each.
- Stir in 1 teaspoon refined coconut oil if the coating looks thick.
- Aim for yogurt-like flow that coats a spoon and runs in a steady ribbon.
Stick and secure
- Dip the tip of each stick 1/4 inch into the pink coating.
- Insert the stick halfway into a chilled cake ball.
- Stand the pops upright in a Styrofoam block and chill 10 min.
Dip and smooth
- Rewarm the coating in short bursts if it thickens.
- Dip each pop straight down, then lift and gently tap the wrist to release excess.
- Spin the stick slowly so the coating settles into a smooth shell.
- Add sprinkles while the coating stays wet if you plan to use them.
Pipe the bows
- Melt white candy melts and transfer to a piping bag fitted with a small round tip.
- Pipe a tiny knot in the center, add two loops, then add short tails.
- If you want a darker pink bow, tint a small portion of melts with oil-based candy color.
- Let the bows set 10 to 15 min in the stand.
Finish and set
- Dust a hint of edible glitter on the bows if you like extra sparkle.
- Let all pops set until dry to the touch.
- Serve right away or store as directed below.
Tips & Tricks
- Use less frosting than you think, then add by the spoon. You want fudge-like dough, not paste.
- Keep pops cold and coating warm. That combo gives a clean dip with fewer cracks.
- Thin thick coating with refined coconut oil or paramount crystals, a little at a time.
- Dip in a tall, narrow cup to submerge the pop in one dunk.
- Fix cracks by brushing a touch of warm coating over the line.
- Pipe bows on parchment to practice, then transfer with a toothpick if that feels easier.
- Work in small batches out of the fridge so the balls stay firm.
What to Serve with Pink Bow Cake Pops Recipe
Set these pink bow cake pops on a tiered stand with mini cupcakes and fresh berries for a party board that looks photo-ready. Pair them with milk for kids, espresso for adults, or a citrusy mocktail that cuts the sweetness. For a theme, match the bow color to the event and tuck each pop into a cellophane bag with ribbon. They travel well and double as party favors.
Make-Ahead and Storage
- Make the cake balls and chill up to 3 days in the fridge, tightly covered.
- Freeze undipped balls on a sheet until firm, then bag for up to 2 months. Thaw in the fridge, then dip.
- Store dipped pops at cool room temp up to 3 days in a single layer, or in the fridge up to 1 week.
- If chilled, let pops stand at room temp 20 to 30 minutes before serving so the center softens.
- Avoid humid environments, and keep them away from direct sun to prevent color bleed.
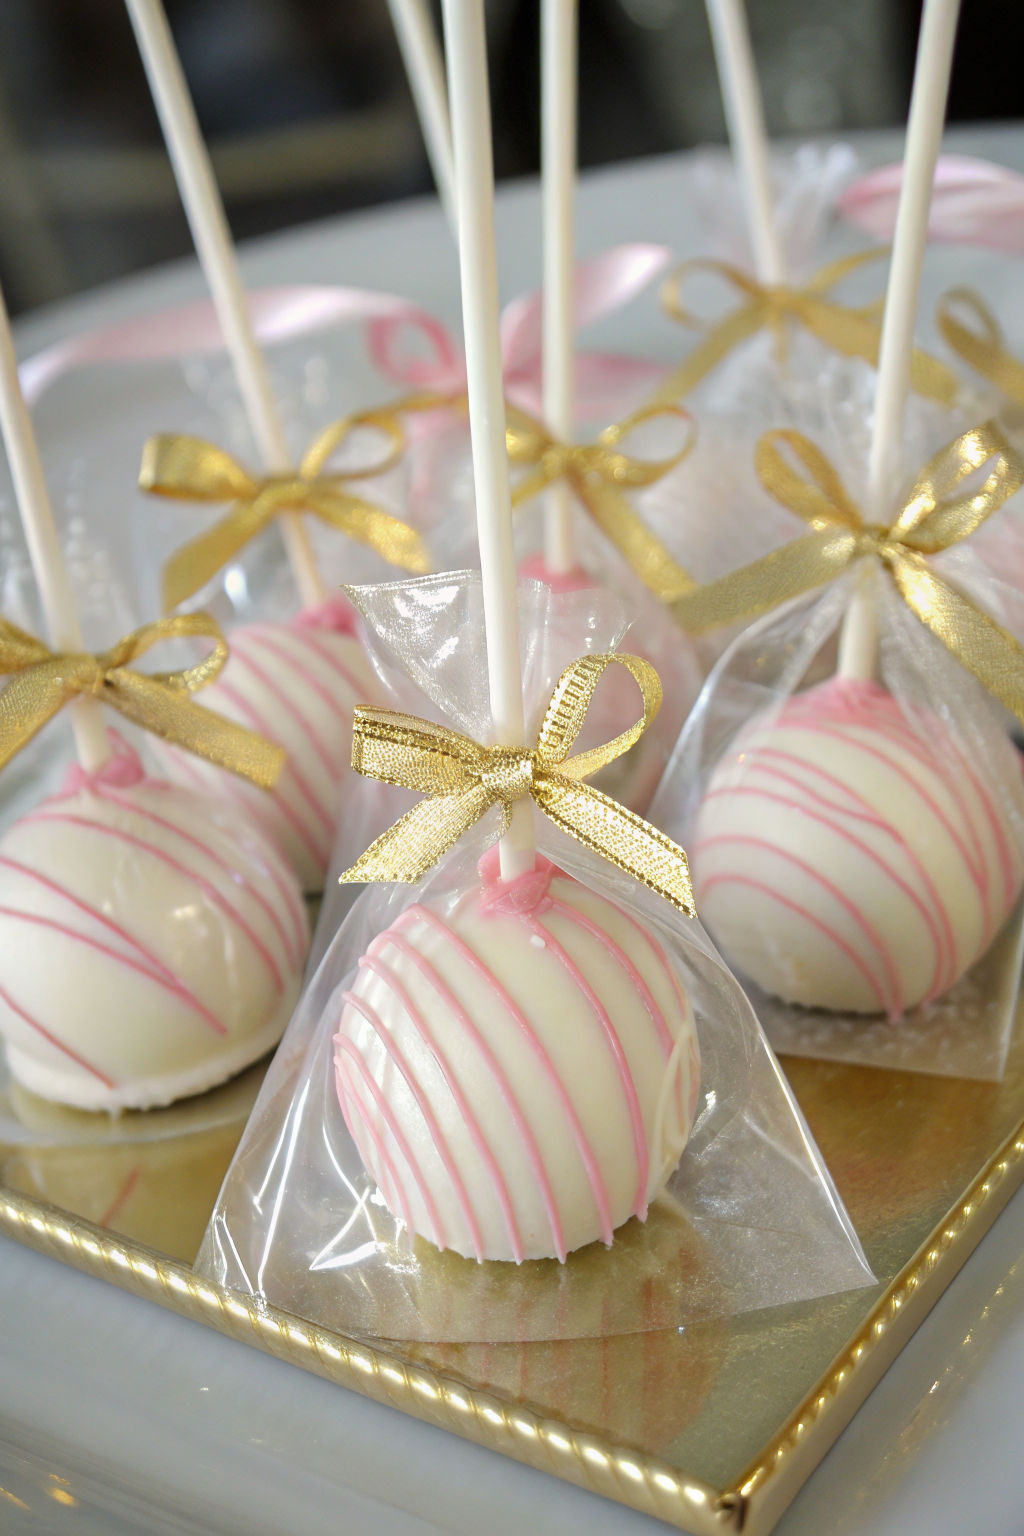
Pink Bow Cake Pops Recipe
Ingredients
Instructions
- Break the cooled vanilla cake into fine crumbs in a large mixing bowl.
- Add 3/4 cup vanilla buttercream frosting and mix until the crumbs come together into a moldable, cookie dough–like mixture.
- Pinch a bit of the mixture; if it cracks or feels dry, mix in additional frosting 1 tablespoon at a time until smooth and fudgy but not wet.
- Use a 1-tablespoon cookie scoop to portion level scoops of the cake mixture onto a parchment-lined baking sheet.
- Roll each portion between your palms until very smooth and round.
- Arrange the cake balls on the baking sheet, cover lightly, and chill in the refrigerator for 20–30 minutes until firm.
- Place pink candy melts in a microwave-safe cup or tall mug.
- Microwave in 20–30 second bursts, stirring well between each, until fully melted and smooth.
- If the coating is thick, stir in 1 teaspoon refined coconut oil or paramount crystals. Add more a little at a time until the coating flows like yogurt, coating a spoon and running off in a steady ribbon.
- Dip the tip of a lollipop stick about 1/4 inch into the melted pink coating.
- Insert the dipped end of the stick halfway into the center of a chilled cake ball.
- Place the pop upright in a Styrofoam block or cake pop stand. Repeat with remaining cake balls.
- Chill the pops upright for about 10 minutes to set the sticks.
- Rewarm the pink coating briefly in the microwave if it has thickened, stirring until smooth.
- Holding a pop by the stick, dip the cake ball straight down into the coating until fully submerged.
- Lift it out and gently tap or shake your wrist so excess coating drips off, rotating the stick slowly to help the coating settle into a smooth, even shell.
- While the coating is still wet, add sprinkles or sanding sugar if using.
- Return the dipped pop to the stand to set. Repeat with remaining pops.
- Melt the white candy melts in a microwave-safe bowl using short bursts, stirring until smooth. Tint with a small amount of pink gel or oil-based candy color if desired.
- Transfer the melted white coating to a piping bag fitted with a small round tip (about size 2) or into a zip-top bag with a tiny corner snipped off.
- On each set cake pop, pipe a small knot in the center, then add two loops for the bow and short tails underneath.
- Alternatively, pipe bows onto parchment paper, let them firm up, then transfer to the pops with a dab of melted coating, or attach pre-made sugar bows.
- Return pops to the stand and let the bows set for 10–15 minutes.
- If desired, dust a light pinch of edible glitter over the bows for sparkle while they are still slightly tacky.
- Let the pops stand until completely dry to the touch and fully set before serving or packaging.
Notes
Approximate per 1 cake pop (about 1/18 of recipe): 220 calories; fat 11 g; saturated fat 6 g; carbohydrates 29 g; fiber 0 g; sugars 23 g; protein 2 g; sodium 210 mg. Values are estimates and will vary based on cake mix, frosting brand, candy melts, decorations, and exact portion size. Storage
Store finished pops at cool room temperature for up to 3 days or refrigerate for up to 1 week. Let chilled pops sit at room temperature for 20–30 minutes before serving for the best texture.