
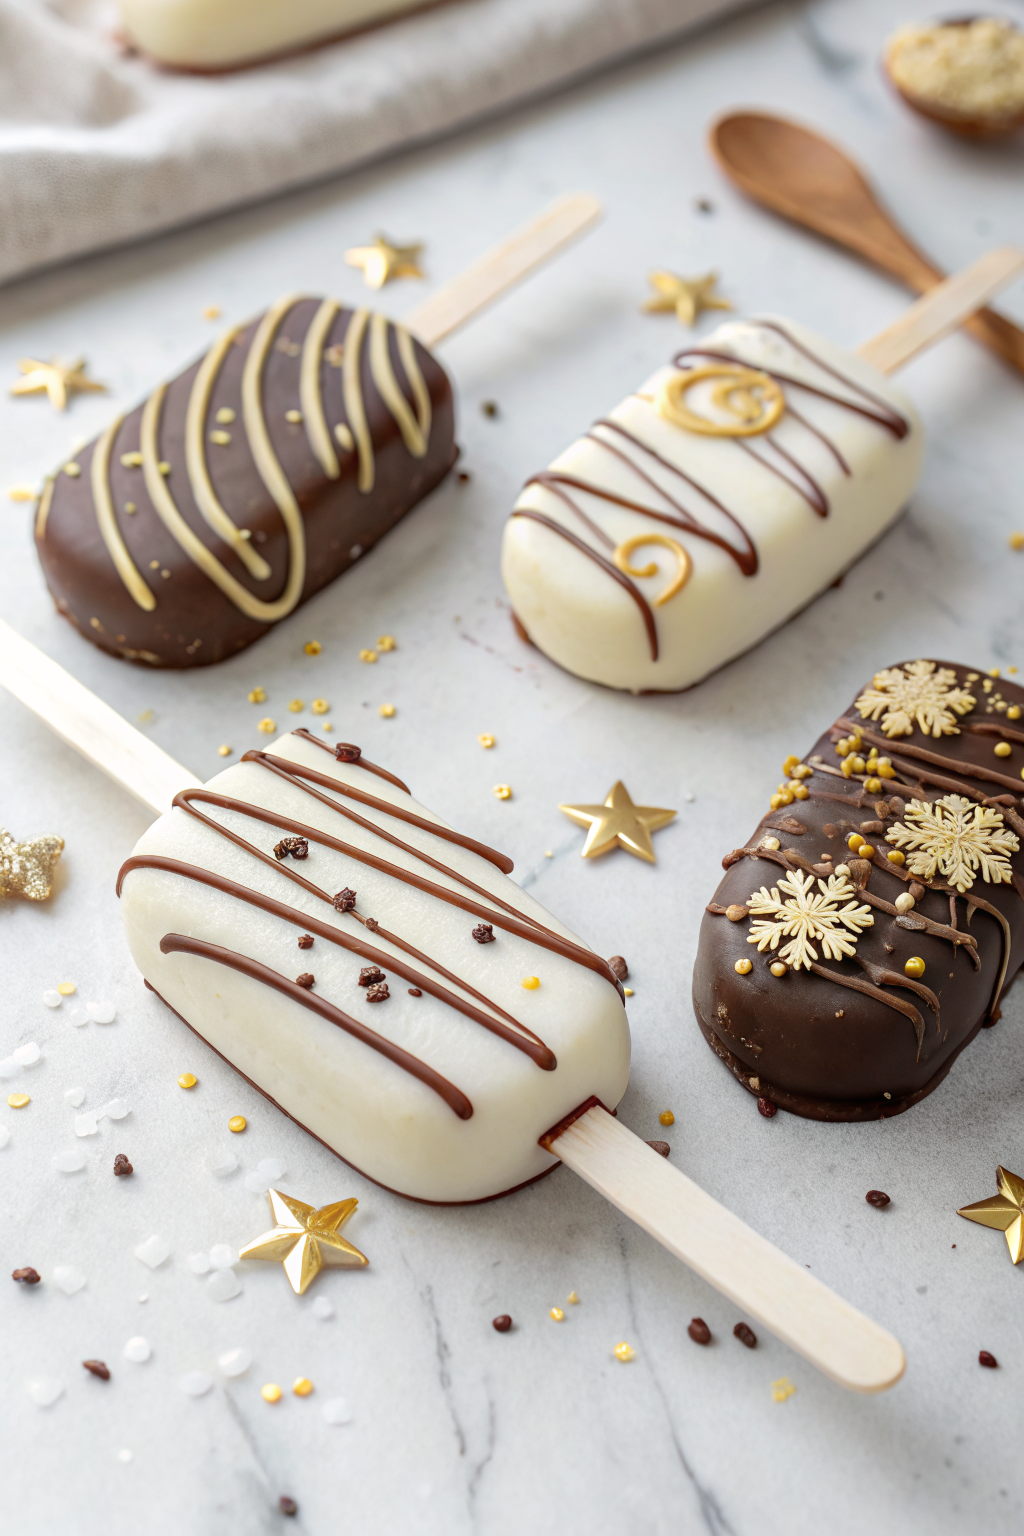
Easy Cakesicles Recipe delivers a rich, fudgy center wrapped in a snappy chocolate shell that tastes like a cake pop’s cooler cousin. It suits beginners, kids, and party planners, and it takes about 60 minutes with shortcuts or about 2 hours if you bake the cake. I made these for my niece’s birthday, and my apron still sparkles from the sprinkle storm.
Why You Should Try This Easy Cakesicles Recipe
This Easy Cakesicles Recipe keeps the process simple while giving bakery-level results. You mold a rich cake-and-frosting filling, dip it in smooth chocolate, and get shiny shells that snap. Kids love the shape, and adults sneak seconds.
My crew wiped out two dozen in fifteen minutes and then asked when the next batch would land ★★★★★
Ingredients You’ll Need
- Cake, any flavor, 9×13 pan or 3 to 4 cups crumbs (pantry shortcut: boxed mix or store-bought pound cake works great)
- Frosting, 1/2 to 3/4 cup, room temp (buttercream or cream cheese; canned frosting saves time)
- Candy melts or coating wafers, 12 to 16 ounces (Wilton, Merckens, or Ghirardelli melting wafers melt smoothly; use real couverture only if you temper it)
- Coconut oil or cocoa butter, 1 to 2 teaspoons optional (thin thick melts for a smoother dip)
- White chocolate for drizzle, 4 ounces optional (use oil-based gel color if you want color)
- Flavor boosters optional: 1 teaspoon vanilla or almond extract, citrus zest, pinch of fine salt
- Decorations: sprinkles, crushed cookies, freeze-dried berry dust, mini chips
- Popsicle sticks or cakesicle sticks
Equipment:
- Silicone cakesicle mold, 6 to 8 cavities
- Microwave-safe bowls and a silicone spatula
- Piping bag or zip-top bag
- Small offset spatula or butter knife
- Toothpicks for bubble popping and detail work
- Baking sheet lined with parchment
- Optional: instant-read thermometer if you temper real chocolate
- Food-safe gloves for clean handling
How to Make Easy Cakesicles Recipe
Step 1: Bake or source the cake (optional, 30 to 35 minutes)
Bake a 9×13 cake and let it cool completely, or buy a plain bakery cake or pound cake. Strip off any hard or overly browned edges. Keep the cake moist but not wet.
Step 2: Crumble and bind the filling (10 minutes)
Crumble the cake into a bowl until you get fine, even crumbs. Add 1/2 cup frosting and mix with clean hands until the mixture holds together like soft modeling clay. Add up to 1/4 cup more frosting if the mixture feels dry. Stir in a pinch of salt or a splash of extract if you want more flavor.
Step 3: Prep the chocolate coating (5 to 10 minutes)
Melt candy melts at 50 percent power in the microwave in 30-second bursts, stirring after each round. Add 1 teaspoon coconut oil if the coating looks thick. If you work with real chocolate, heat two-thirds of the chopped chocolate to 110 to 115 F for dark or 105 F for milk and white, then seed with the remaining chocolate and stir down to 88 to 90 F for dark or 86 to 88 F for milk and white.
Step 4: Coat the molds (5 minutes plus 5 minutes chill)
Spoon or pipe 1 to 2 teaspoons melted coating into each mold cavity. Tilt and swirl to coat the base and sides, then use the spatula to nudge chocolate up the walls. Tap the mold to release bubbles, scrape excess from the top, and chill 5 minutes until the shell firms up.
Step 5: Fill and insert sticks (10 minutes)
Press a portion of cake mixture into each shell, keeping a thin gap at the top for sealing. Slide a stick through the slot and center it. Press the filling snugly around the stick so it stays put.
Step 6: Seal the backs and chill (10 to 15 minutes)
Cover the backs with more melted coating and smooth the surface. Clean the edges with a spatula so the shell looks neat. Chill until fully set.
Step 7: Unmold and decorate (10 minutes)
Gently peel the mold away from each cakesicle and lift by the stick. Drizzle with contrasting chocolate, add sprinkles, or press on cookie crumbs while the drizzle still feels wet. Use a toothpick to pop any tiny bubbles or to tidy edges.
Step 8: Set and serve (10 minutes)
Let the coating sit at room temp until it firms up completely. Plate them on parchment so the backs stay smooth. Smile and watch them disappear.
Tips & Tricks
- Aim for a soft, dough-like filling that holds its shape without crumbling.
- Keep the coating warm and fluid; set the bowl over a mug of hot water to hold temp.
- Color white melts with oil-based color only; water-based colors can seize the coating.
- Work in batches so the chocolate stays silky and the shells do not streak.
- Add a teaspoon of coconut oil to thin thick melts; avoid too much or the shell softens.
- Chill the mold briefly between layers to keep edges crisp.
- Wipe sticks before inserting so no smears show on the handle.
- Use gloves for a smudge-free finish.
- Store decorations within arm’s reach so you can sprinkle while the drizzle still feels wet.
What to Serve with Easy Cakesicles Recipe
Pair these with cold milk, hot coffee, or a berry iced tea. Add fresh strawberries or sliced oranges for a bright, juicy contrast. For parties, set out a dipping bowl of warm ganache and a sprinkle bar so guests can jazz up their own. A scoop of vanilla ice cream on the side never hurts.
Make-Ahead and Storage
Make the cake-and-frosting filling up to 3 days ahead and chill it in an airtight container. Store finished cakesicles in a single layer in a parchment-lined container at room temp for up to 2 days if your kitchen runs cool, or in the fridge for up to 7 days. Freeze them for up to 2 months; wrap each one in plastic, then place them in a freezer bag.
Thaw frozen cakesicles overnight in the fridge or 30 to 40 minutes at room temp. Skip direct heat and ovens, since the coating melts. To bring back the best texture, let chilled cakesicles sit at room temp 10 to 15 minutes before serving.
Easy Cakesicles Recipe
Ingredients
Instructions
- Bake a 9x13-inch cake according to package or recipe directions and let it cool completely, or use a plain bakery cake or pound cake. Trim away any hard or overly browned edges.
- Crumble the cooled cake into a large bowl until you have fine, even crumbs. Add 1/2 cup frosting and mix with clean hands until the mixture holds together like soft modeling clay. Add up to 1/4 cup more frosting if the mixture feels dry. Stir in a pinch of salt, extract, or citrus zest if desired.
- Place candy melts or coating wafers in a microwave-safe bowl. Microwave at 50% power in 30-second bursts, stirring after each, until smooth and fully melted. If the coating seems thick, stir in 1 teaspoon coconut oil or cocoa butter and add more as needed, a little at a time.
- Spoon or pipe 1 to 2 teaspoons of the melted coating into each cavity of a silicone cakesicle mold. Tilt and swirl the mold so the base and sides are fully coated, nudging the chocolate up the sides with a spatula if needed. Tap the mold on the counter to release air bubbles, scrape excess from the top, and chill for about 5 minutes until the shells firm up.
- Press a portion of the cake-and-frosting mixture into each chocolate shell, leaving a thin gap at the top for sealing. Slide a stick through the slot in each mold and center it, pressing the filling snugly around the stick so it stays in place.
- Cover the backs of the cakesicles with more melted coating, smoothing the surface with a spatula. Clean up the edges so the shells look neat, then chill until fully set, 10 to 15 minutes.
- Gently peel the silicone mold away from each cakesicle and lift by the stick. Drizzle with melted white chocolate or contrasting coating and decorate with sprinkles, crushed cookies, berry dust, or mini chips while the drizzle is still wet. Use a toothpick to pop any bubbles or tidy the edges.
- Let the coating firm up completely at room temperature. Arrange the cakesicles on parchment-lined trays for serving.
Notes
Approximate per cakesicle (1 of about 24): 210 calories; fat 11 g; saturated fat 6 g; carbohydrates 27 g; fiber 1 g; sugars 19 g; protein 2 g; sodium 180 mg. Values are estimates and will vary based on cake flavor, frosting type, coating brand, decorations, and portion size. Storage: Keep at room temperature up to 2 days in a cool kitchen, refrigerate up to 7 days, or freeze up to 2 months (well wrapped). Thaw in the fridge, then let sit 10 to 15 minutes at room temperature before serving.