
How to Make Sourdough Starter gives you a tangy, slightly fruity aroma and a lively flavor that bakes into bread with a crisp crust and tender crumb. Home bakers who want a natural leaven will love this, and you can build a usable starter in about 5 to 7 days with roughly 5 minutes of hands-on time per day. I keep a jar on my counter like a pet that only eats flour and water.
Why Choose This Sourdough Starter Recipe
This How to Make Sourdough Starter method uses simple flour and water, a digital scale, and consistent feedings to give dependable results. You nurture wild yeast and friendly bacteria that lift dough and add complex flavor. I tested this schedule across seasons, and it stays steady if you keep it warm and feed on time.
You also learn what signs to watch for, so you can adjust feeds with confidence. I include discard ideas so you waste less flour while your culture gains strength.
Ingredients You Need
- Unbleached all-purpose flour, 4 to 5 cups total. I like King Arthur or Bob’s Red Mill for predictable protein. Pantry shortcut: start with whole wheat or rye for the first couple of days to jumpstart activity.
- Whole wheat flour, 1 to 2 cups, optional for days 1 to 3. Sub with rye flour for even faster activity.
- Water, room temperature, chlorine-free. Use filtered or bottled if your tap smells strongly of chlorine. Aim for 70 to 75 F.
- Optional: a pinch of rye on slow days to boost activity.
Equipment
- 1 clear glass jar, about 1 quart, with a loose lid. A wide-mouth jar makes stirring easier.
- Digital scale. Accuracy matters here.
- Spoon or chopstick for stirring, and a rubber band to mark levels.
- Thermometer, optional, to check room and water temperature.
How to Make Sourdough Starter
Day 1: Mix and Rest
- In a clean jar, mix 60 g whole wheat flour with 60 g water until no dry spots remain. Scrape down the sides.
- Cover the jar lightly, mark the level, and set it at 70 to 75 F for 24 hours.
Day 2: Feed and Watch
- You may see a few bubbles and smell a mild tang. Stir to redistribute.
- Discard all but 60 g starter. Add 60 g water and 60 g flour (use half whole wheat, half all-purpose). Stir, cover lightly, and mark the level.
Day 3: Consistent Daily Feed
- Discard down to 60 g starter. Feed 60 g water and 60 g flour. Switch to all-purpose now if you want a milder flavor, or keep some whole wheat for speed.
- Keep the jar warm. You want regular bubbles and a pleasant, slightly sour aroma.
Day 4: Increase Feeds if Activity Jumps
- If your starter doubles in 6 to 8 hours and smells bright and tangy, move to two feeds per day.
- At each feed, keep 30 g starter and add 60 g water and 60 g flour. Stir well and keep it warm.
- If activity still crawls, stay with one feed per day and keep the temperature steady.
Days 5 to 7: Build Strength
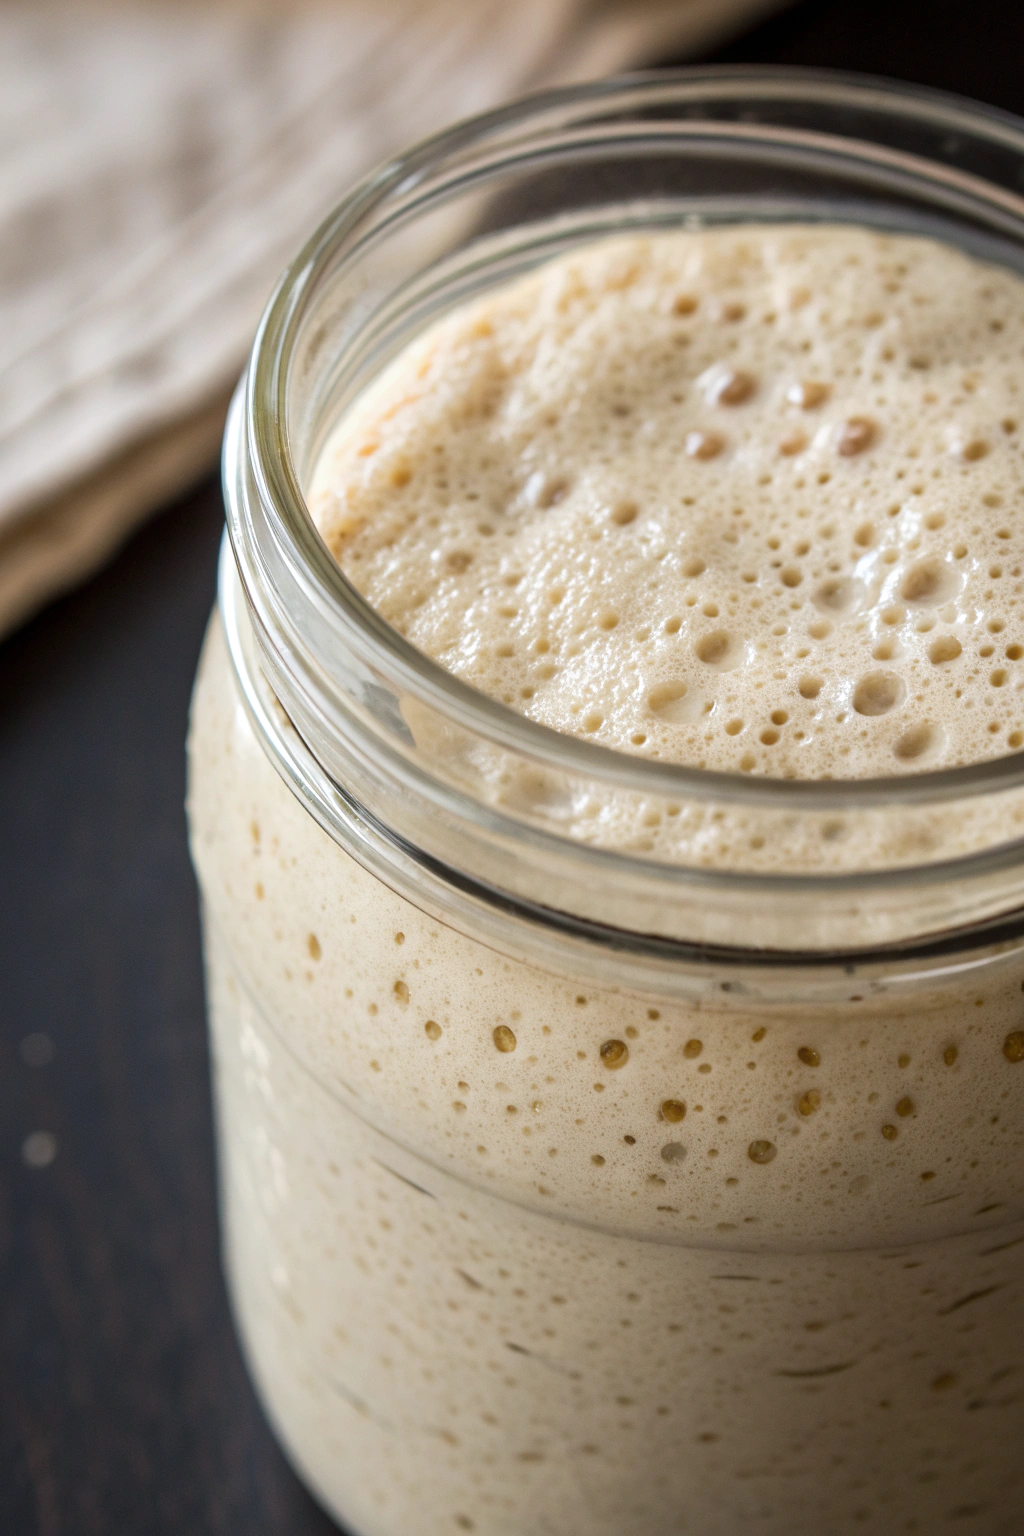
- Continue two feeds per day until the starter doubles in 4 to 6 hours and shows a domed top with lots of tiny bubbles.
- Aim for a thick batter consistency. If it looks runny, increase flour slightly; if it looks stiff, add a splash of water.
- Keep the jar at a steady temperature. Consistency grows strength.
How to Test Activity
- Perform a float test when the starter peaks. Drop a teaspoon of starter into room-temperature water. It floats when it traps enough gas.
- Bake with it at peak height, not hours after it collapses.
What to Do With Discard
- Save discard in a separate container in the fridge. Use it in pancakes, waffles, crackers, muffins, or pizza dough.
- If the jar overflows, use a larger container or reduce the kept starter at each feed.
Tips & Common Mistakes
- Feed by weight, not by volume, for accuracy and predictable hydration.
- Keep it warm. Target 70 to 75 F. Cold rooms slow everything.
- Use chlorine-free water. Chlorine can slow or stall growth.
- Do not change flours constantly. Pick a base flour and stick with it after day 3.
- Mark the level after each feed. That line tells you when it doubles.
- Stir well at each feed. You evenly distribute food and oxygen.
- Avoid airtight lids. The culture releases gas and needs room to breathe.
- If it smells like nail polish remover, feed more often and keep it warmer.
- If it smells rotten, start over with clean gear and fresh flour.
- Keep the jar clean. Scrape down sides to prevent dry crusty bits.
Variations I’ve Tried
- Rye jumpstart: I used rye flour for days 1 to 3, then switched to all-purpose. Activity ramped up faster and flavor deepened.
- Firm starter: I kept a 60 percent hydration starter for bagels and pizza. It ferments more slowly and tastes slightly sweeter.
- Gluten-free: I maintained a brown rice flour starter at 100 percent hydration. It raised gluten-free breads and pancakes nicely.
- Pineapple juice start: I swapped pineapple juice for water on days 1 and 2, then used water afterward. The early acidity kept off-odors away in a hot summer kitchen.
How to Serve
Use active sourdough starter in country loaves, sandwich bread, focaccia, pizza dough, pancakes, and waffles. Pair warm slices with salted butter and honey, or go savory with olive oil, cracked pepper, and flaky salt. Sourdough croutons upgrade salads and soups. Discard-based crackers love sharp cheddar, soft goat cheese, or a swipe of pesto.
Make-Ahead and Storage
- Room temperature: If you bake daily, keep the starter on the counter and feed twice per day. Bake at peak height for the strongest rise.
- Refrigerator: Feed, let it rise for 1 to 2 hours, then cover and chill up to 1 week between feeds. To bake, bring it to room temperature and give 1 to 2 feeds until it peaks in 4 to 6 hours.
- Freezer: Feed, let it rise slightly, then freeze in a small jar with headspace for up to 3 months. Thaw in the fridge overnight, bring to room temperature, and feed twice before baking.
- Long-term backup: Dry a thin layer on parchment until brittle, then store in an airtight bag in a cool, dark place for up to 1 year. To reactivate, soak 1 tablespoon flakes in 1 tablespoon water, then feed 1:1:1 by weight for a few days.
- Best reheating method: Do not heat the starter. Set a cold jar on the counter until it reaches room temperature, then feed to wake it up.
How to Make Sourdough Starter
Ingredients
Instructions
- Day 1: In a clean glass or food-safe plastic container, stir together 1 cup flour and 1 cup lukewarm water until no dry flour remains. The mixture should be thick but stirrable, like pancake batter.
- Cover the container loosely with a lid or cloth to allow airflow while keeping out dust. Leave at room temperature (around 70°F/21°C) for 24 hours.
- Day 2: You may or may not see small bubbles. Discard about half of the mixture (around 1 cup). To the remaining starter, add 1/2 cup flour and 1/2 cup lukewarm water. Stir thoroughly, cover loosely, and let rest another 24 hours.
- Day 3: You should start to see more bubbles and a mild tangy aroma. Again, discard about half of the starter. Feed with 1/2 cup flour and 1/2 cup lukewarm water, stirring until smooth. Cover and rest 24 hours at room temperature.
- Day 4: The starter should be showing regular bubbling, may rise and fall, and will smell pleasantly sour. Repeat the process: discard half, then feed with 1/2 cup flour and 1/2 cup water. Mark the level after feeding so you can see how much it rises.
- Day 5 and beyond: Continue daily feedings (discard half, then add 1/2 cup flour and 1/2 cup water) until the starter reliably doubles in volume within about 4–8 hours of feeding, is bubbly throughout, and smells tangy and yeasty. At this stage it is ready to use in sourdough recipes.
- To maintain your mature starter at room temperature, feed it daily as above. For less frequent baking, refrigerate the starter and feed it at least once a week, letting it come to room temperature and bubble after each feeding before returning it to the fridge.
Notes
Approximate for entire batch (about 2 cups mature starter): 800 calories; fat 2 g; saturated fat 0 g; carbohydrates 168 g; fiber 6 g; sugars 1 g; protein 24 g; sodium 10 mg. Per 1/4-cup portion: 100 calories; fat 0 g; saturated fat 0 g; carbohydrates 21 g; fiber 1 g; sugars 0 g; protein 3 g; sodium 1 mg. Values will vary based on flour type, hydration, fermentation time, and portion size.